Saturday, February 28, 2009

Inspirational Stories for Publication

A fellow blogger and author recently put out a call for inspirational stories that she will compile and publish in the near future. This individual, Jena Isle, has the website GewGaw Writings. Here is her banner:Ms. Isle states in her blog the term "gewgaw" ...

... in this site means " bauble" - "baubles" of writing....an attempt to write poems, short stories, essays, quotations and what-nots...
She plans to put together twelve inspirational stories which she has garnered for a book she believes will be a good read for a wide audience.

The oral story I submitted last August to the National Public Radio Story Corps was one about a moral and medical decision which was made almost forty years ago that has had far reaching impact. You can read it here at Jena Isle's blog. If you scroll through her blog, all twelve stories she has chosen can also be read.

When she publishes, she will send each of the contributors one of these books. Thank you, Jena, for selecting this story as one of the twelve you believe worthy of publication. Best success on your book, as well.

Thursday, February 26, 2009

Using Blingee Program for Glitter Graphics

glitterlily
Make custom Glitter Graphics

...just stumbled upon a free graphic program found at Blingee. An example of a blinged out picture is shown above. It is a free program and has dozens of graphics from which to choose.

These are the two main photographs shown below (but not blinged out) that I am using as inspiration to create a new oil painting that should be finished before the start of summer.


The lovely close-up picture of the pink and purple lily was taken by Kelly Sheimberg while on the New Zealand/Australia Scrabble cruise trip last month.

Thus far, two coats of underlying orange and yellow primer have been put on the canvas, and I hope to sketch out the lily and foliage by the end of the day. This painting will incorporate some of the newer water based oils readily available on the market. I'm thinking of jewel tones for the petals of the flower with lots of greens/blues for background foliage.

The first painting will be on a 11" x 14" canvas. By the start of summer, I would like to paint a similar lily in varying hues of pinks, reds and purples on a 36" x 48" canvas. Please contact me if you are interested in acquiring either of these original works.

Tuesday, February 24, 2009

Using Index Cards for Knitting Directions

Listening to a podcast about knitting tips a few months ago on Knitpicks, Kelley Petkun talked about translating lace charts for knitting on to index cards for easier reading while knitting. Since lace knitting was not on my radar back then, it did not occur to me that I would be looking for just such a tip in the near future.

Now that I am knitting with lace motifs, Petkun's hints made so much sense that I had to try it for myself: using index cards, that is!

If you are not a knitter or need any chart interpretation tips, stop reading here. (pause)

But if you are looking for an easier way to decipher knitting instructions from the written page, this posting may be your ticket to easier knitting.

The key is to write down ONE row of instructions at a time, transfer that ONE row of directions to an index card, and then organize the cards sequentially so that your directions are all transferred onto a set of index cards held together by a big locked ring available at any office supply store. After the completion of one row of instructions listed on the index card, just flip over to the next card. Be sure to check and triple check your typed instructions against the original pattern.

By following ONE row of instructions at a time, put on a separate card, your eye will not confuse which row of pattern you need to follow... much easier on the eye and brain!

Another hint: type out the instructions on a word processing program, using the appropriate label format for the labels you have on hand (mine is a 10 year old box of Avery #5366 Laser File Folder Labels). Then just peel off each label and affix to an index card, row by row.

Below is a close-up picture of a portion of a lace scarf recently completed using the index card method of following a more complicated set of instructions:


To hear Kelley Petkun expand on the merits of using this easier way to read charts, go to this podcast for step by step directions: Podcast on Lace Knitting Tips.

This is a picture of the completed lace scarf (the scarf pattern is from Kay Meadors' I Can't Believe I'm Lace Knitting book):

Trust me, I ripped and re-ripped this scarf many times before completely starting again and using the index card method of following knitting directions; the Petkun tip allowed me to finally finish the project. Thanks, Kelley and Knitpicks!

Monday, February 23, 2009

Glass Jar Uses in Photo Crafts


Another tip for going green and creating fun crafts is using old glass jars.

Picture and instructions from Photojo:

It’s so simple we can’t believe we didn’t think of it before: just slide a photo into a jar, turn it upside down and display your upcyclin’ genius for all to see.

How simple is that?

It is a useful idea to use on a kitchen window sill: water splatters come off the glass in the dishwasher (but take out your photo prior to washing.....hehehe).

Thursday, February 19, 2009

Beaded Earrings for Hospice Fundraiser


Hospice of Western Colorado will host a fundraiser and an appreciation dinner for their volunteers in April. The theme for the fundraiser is "Art for Hospice".

My contribution to the effort is a dozen pairs of handmade earrings , some made by using the Japanese method of Makume Game technique using polymer clay, and others with glass beads and purchased findings.


If you have any extra glass beads or earring supplies that you would care to give to the Hospice of Western Colorado, please email me at nmccarroll at mindspring dot com and let me know, and your beads will be used in making more earrings for this fundraiser. (Some of you who read this blog make lovely things, and if you have some extra pieces not being put to good use, this would be a nice gesture on your part. Please be sure and let me know your website, and I will pass that along also.)

Thanks!

Tuesday, February 17, 2009

Felted Bowls as Blessing Bowls

Last year I whipped up five or six felted bowls with directions from the book One Skein, 30 Quick Projects to Knit and Crochet, by Leigh Radford (Interweave Press). Back in the spring last year I blogged about the book here, and said that felting was a fun project since all kinds of mistakes in knitting can be camouflaged simply by the way the shrinkage factor covers blunders.

One of the bowls I made is just perfect to be given to my friend undergoing chemotherapy for breast cancer. I filled it with candies and attached a little cross tied on to it with a pink ribbon, and filled it with peppermint candies. Here is the card I copied, with a verse from Walt Whitman, that she may enjoy pondering:


The quotation by Whitman is: "The strongest and the sweetest songs yet remain to be sung."

That is something to think about, isn't it? So if you feel you are used up and tired, remember that there is more life ahead!

Hopefully, a Blessing Bowl is the right gift given at the right time (later today, while she is undergoing treatment) for my friend Carole. This site: Eclectic Gallery gives a summarization of my heartfelt thoughts being conveyed to Carole with this bowl:

The Blessing Bowl is a vessel to share caring, love, thoughtfulness, compassion, joy, feelings, gratitude, and more. The Blessing Bowl... holds written acknowledgment of the blessings in your life.... it is a given as a gift of gratitude, a way to connect with our spirituality, a customized gift that celebrates life's blessings.

So often we forget to tell people in our life how much they mean, the Blessing Bowl gives you the opportunity to tell them how important they are.

This is Carole's gift, along with an attached charm in the shape of a cross that was purchased at the local craft store:

"The Lord is gracious and full of compassion, slow to anger and great in mercy. The Lord is good to all, and His tender mercies are over all His works." (Psalm 145:8)

Monday, February 16, 2009

Lemon Tart with Rosemary and Strawberries

Ok, it's about time for a recipe.

The man of the house reaaaaallllllly enjoys cooking. And he is good at it. But every now and then, a dessert is nice. He does not bake, so that excursion into food decadency is left to me.

This recipe from Woman's Day Magazine caught my eye. Perhaps it was the fresh rosemary leaves in the tart shell that seemed like an interesting combination in a pastry.

Here is a picture of the featured dessert "Lemon Tart with Strawberries", courtesy of Woman's Day.


If a list of ingredients calls for sweetened condensed milk, it MUST be tasty! The ingredients are shown below, in case the picture whets your appetite, and all the instructions can be found here at Woman's Day.

Tart Shell: 1 1⁄4 cups all-purpose flour
1⁄4 cup confectioners’ sugar
1 Tbsp freshrosemary leaves
1⁄4 tsp salt
1 stick (1⁄2 cup) cold unsalted butter, cut into pieces
1 large egg yolk mixed with 1 Tbsp water

Lemon Filling: 1 (14 oz) can sweetened condensed milk
5 large egg yolks
2 tsp grated lemon zest
1⁄2 cup lemon juice

Decoration: 12 strawberries, hulled and halved
Our tart did not finish up quite as pretty as the professional picture, but it probably tasted just as fine. Man, was it good!

Any by the bye, there are 400 calories per serving. Sigh.

(Picture found at Flickr.)

Saturday, February 14, 2009

Knit Sweater Finished by Valentine's Day

When I saw the sweater pattern highlighted in Ravelry on this page: Pullover for Women, I knew I wanted to knit this since the needlework begins at the neck.

So, months later, here it is finished:

This pattern can be found at Knitting Pure and Simple. And a better picture of the same knitted sweater, again supplied by Knitting Pure and Simple, is this one:


This gal is much cuter than the broad sporting the red sweater, and the model's sweater does not have the mistakes in it that can be seen on the red sweater!

But with a scarf around the neck, most of the glaring mistakes are (hopefully) camouflaged.

This sweater took 10 skeins of DK yarn to complete, and the pattern is only $5.00. Check out more patterns at Knitting Pure and Simple.

Thursday, February 12, 2009

How to Make a Pop-up Valentine Card

Looking for a way to make a personalized valentine, I came across this video; the two cuts that are the beginning of any pop-up card are the key for a three dimensional look.


Using recycled Christmas cards (many are red in color), "thinking of you" sentiments on all occasion cards, and a pair of scrap booking scissors with a decorative edge, you can make many different kinds of cards for your valentine.

Here is one re-made from a get-well card with the Bible verse included: I am overcome with joy because of Your unfailing love, for You have seen my troubles." Psalm 37:7 -- That verse is on the inside of this little recycled note card.


A bit of confetti or excelsior used in packaging adds a decorative touch. Knock yourself out, and give others a lift with a hand made card for any occasion.

Monday, February 9, 2009

Making Suet Cakes for Birds

Even birds like food treats, especially in the winter. From Feeding Birds, here is an easy homemade suet cake that your birds might enjoy now:
Making homemade suet cakes is simply a matter of melting fat down to a pour-easy consistency, adding a few ingredients of your choosing, then pouring the mixture into a mold. The shape of the mold is determined by the type of suet feeder you'll use.

If you are using lard or shortening for homemade suet cakes, adding equal parts of peanut butter flour will help maintain correct consistency of regular suet cakes.

To this warm and pour-able mixture you could add rolled oats, bird seed, cornmeal, raisins, unsalted nuts and anything else you think the birds would enjoy. Then, pour your warm suet 'soup' into the mold (a bread pan where you could slice off bits for your store bought suet feeder, cupcake tins that you could pierce with wire and hang from a tree, etc).
This little guy was photographed Saturday by Jack Heniford in South Carolina:

Cardinals (redbirds) are attracted to sunflower seeds and safflower seeds, according to Plant Answers.

Let me know if you have success with feeding birds, and what type feeder you have.

Friday, February 6, 2009

Possum Fur and Wool Fiber Blend for Knitting

Who knew that knitting with possum fur was a rage? In Dunedin, New Zealand, I picked up five skeins of wool that was manufactured there and is indigenous to the region because it consists of 40% possum fur, 50% Merino wool and 10% silk. It is soft, warm, and light weight.

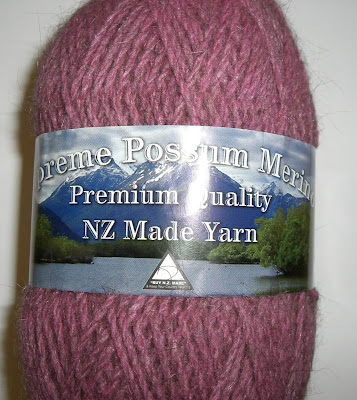
When I got home, I looked up properties of this type blended wool and found a website Handknitting Possum Wool Yarn that stated the following:

Hand knitting Possum-Wool Yarn... Possum fur blended with merino wool makes a variety of yarns that are very special. Possum-wool yarn has all the properties that a 21st Century garment demands:

Feels like cashmere...
Is hard wearing...
Is light weight...
Is warmer than wool in winter and cooler in summer...
Breathes...
Has an angora 'glow' or halo to it...

NZ Nature says:
Possum Wool is luxuriously soft, incredibly lightweight, exceptionally warm and easy to wear. It won’t pill, it won’t wrinkle, it’s anti-static and is a market solution to an environmental challenge facing New Zealand. Once you’ve tried it nothing else will feel as warm and soft.
This yarn will be made into a shawl from a pattern I have used previously, written about in this prior posting found here, with the pattern from Knit Picks that can be found here. It may take a while to work up this possum fur, since I am making a wider shawl.

Not only can we knit with doghair, but we can also knit with possum, thanks to our furry friends.

I can't wait to start on the possum project!

Join me over at Kellis House for Show and Tell Friday. There is a lot of eye candy to behold there.

Thursday, February 5, 2009

Glass Beads, Wool Yarn and Wooden Buttons

Q: What favorite souvenirs did I bring back from New Zealand?
A: Anything from the Christchurch Artisan and Craft Galleries.

This artisan center (map shown above) houses several dozens of working artisan shops. Their website says:

Once the University of Canterbury, The Arts Centre today is a unique and colourful complex that promotes community education and the growth of arts and crafts in Christchurch. Located in the greenest and architecturally most harmonious part of the city, The Arts Centre is only six minutes walk from the central city, and 15 minutes drive away from the Christchurch International Airport.

West on Worcester Boulevard, The Arts Centre’s role as a venue for cultural recreation in the heart of Christchurch is enhanced by it’s immediate neighbours; the Canterbury Museum, the Christchurch Art Gallery and the Botanic Gardens.

Here are some glass beads from one of the largest bead stores where I have ever shopped, the Beadz Unlimited store. (Photo courtesy of Beadz Unlimited.) Aren't they gorgeous? I found some unusual glass beads in colors that are difficult to match, and also purchased a few beading staples.

This is NZ wool fibre from Fibre Artisans located within the gallery. It is a "Kid Mohair/Merino" blend, produced by Touch Yarns in New Zealand. The quantities and selections were vast, and I had a hard time choosing from their inventory.

Hand carved buttons made from prolific rhododendron branches were another souvenir. An artisan there makes buttons from about a dozen different native woods. Each button in each set was unique. Unfortunately, this artisan is retiring soon. Maybe someone else will take over his trade.


That gives me an idea...Grand Junction is in the heart of wine/vine country in Colorado. Perhaps cutting circles from grape vines and using the Dremel tool to make tiny holes could result in making some grape vine buttons. Hmm...that does not sound too difficult.

Wednesday, February 4, 2009

Flowers In New Zealand


Flowers in New Zealand are gorgeous. Everywhere you look, various species showed off their foliage. Most of the photographs of flowers were taken in Auckland, New Zealand at the Wintergarten Horticultural Centre.

Showcased are lily pads in a water garden, begonias, a carnivorous pitcher plant, and the embryonic parts of a fiddle head fern (after blanching, they are a delicacy used in salads). You can easily identify the day lilies and coral berry bush, as well as fuchsias in hanging baskets.

Here are a few flower photographs incorporated into a video:

Tuesday, February 3, 2009

Wildlife (sanctuaried) in Australia


What an amazing three weeks away in New Zealand and Australia. This post will highlight just a few of the animals that I saw in Australia at the Healesville Sanctuary, under the auspices of the Australian National Zoo.

Healesville Sanctuary is one of Australia’s most recognised attractions, showcasing more than 200 species of Australian wildlife, only one hour from Melbourne.


The pictures, top to bottom, are of the Brogla crane, a wallaby, a sleeping koala bear, a kangaroo, and an emu. These photos were taken Jan. 30, 2009, in the heat of the Australian summer. Most of the animals we saw (including a platypus, whose picture did not turn out due to underexposure in his habitat) were suffering from the hottest summer on record there.

In fact, the Australian Open was being played in Melbourne last week on one of the record high heat days in that area, with temperatures recorded on the court at 140 degrees Fahrenheit. The daytime temperatures hit 115 degrees Fahrenheit when we were walking around the city!

More about the sights Down Under to come later this week.

Wednesday, January 14, 2009

Travelling to New Zealand

We interrupt this blog to bring you a notice that I will not be posting for about three weeks due to exciting developments on the National Scrabble front.

Thirty Scrabble players and our 27 companions will be traveling on a Scrabble cruise (Jan. 16-Feb. 1, 2009) with esteemed travel guides Barbara Van Alen and Larry Rand from Phoenix, AZ. Both are Scrabble directors and have overseen hundreds of tournaments and local club games. Barbara and Larry are excellent tour guides and an all-around wonderful couple who also run a travel agency named "Van Rand Travel". They were highlighted in the Phoenix Magazine in 2008 in a very complimentary article. You can read about their game passion and directing abilities at Word Play in Phoenix Magazine.

You might also check out their Phoenix Scrabble Club information at Phoenix Scrabble Club News.

We (30 Scrabble players and 27 companions of the players) will be leaving from Los Angeles and arriving in Auckland, New Zealand on January 19, 2009.

We will be travelling on the Celebrity Cruise Line around New Zealand, ending our journey in Sydney, Australia on February 1.

Travel itinerary includes:
Auckland, New Zealand Day 1
The "City of Sails," known for its sparkling waters, bustling harbor and cosmopolitan flair, and an ideal spot for water sports and sailing.

Tauranga, New Zealand Day 2
Located at the entrance to one of the largest natural harbors in New Zealand and nestled beside magnificent Mount Maunganui.

Napier, New Zealand Day 4
Arguably one of the prettiest cities in New Zealand, with elegant art deco architecture,captivating beaches and award-wining vineyards.

Wellington, New Zealand Day 5
The cultural, commercial, cosmopolitan capital of New Zealand and home to one of the largest wooden buildings in the world.

Christchurch, New Zealand Day 6
New Zealand's "Garden City," featuring numerous parks and gardens as well as Victorian architecture, avenues and squares.

Dunedin, New Zealand Day 7
Dramatic scenery and some of the finest historic buildings in New Zealand, including remarkable architecture that reflects the city's Scottish roots.

Dusky Sound Day 8
One of three amazing sounds featured on most itineraries. The largest and most complex of the many fjords along this coast, with steep-sided cliffs and hundreds of cascading waterfalls.

Milford Sound, New Zealand Day 8
One of three amazing sounds featured on most itineraries. Situated within Fiordland National Park, part of the Te Wahipounamu World Heritage Site and surrounded by sheer rocks and lush forests.

Doubtful Sound Day 8
One of three amazing sounds featured on most itineraries. An unusual sound with two distinct layers of water: fresh mountain water atop cold,heavy, saline water teeming with remarkable deep-sea species.

Melbourne, Australia Day 11 Day 12
The capital of Victoria and Australia's second largest city. A cultural melting pot of Greek,Chinese, Italian, Vietnamese and Lebanese and host to major international events.

Sydney, Australia Day 14 Day 15
Among the world's most exciting cities with dazzling beaches and the Sydney Opera House, an architectural marvel and arguably the most recognizable performing arts venue.

This will be a tremendous opportunity to learn about another country, to play the addictive game of Scrabble, and to enjoy the summer weather of New Zealand and Australia. I am really looking forward to this trip. Hubby is staying home with the pups and keeping the home fires burning (his choice :o)

See you in a few weeks!

Tuesday, January 13, 2009

Mending with Vintage Fabrics; Mending Hearts

Susan Cooke Kittredge, senior minister at the Old Meeting House, Vermont (daughter of Alistair Cook, whose “LETTER FROM AMERICA” was the longest-running commentary series in history.) Excerpted from “We ALL NEED MENDING” on THIS I BELIEVE, aired on National Public Radio in February, 2008, I would like to copy her writing here because I believe it to be valuable.

After reading through Kittredge's thoughts, I am posting a picture of my favorite work shirt which has been mended over many times with old linens. Each vintage piece incorporates beautiful embroidery work done many years ago by women whom I will never having the privilege of knowing.

by Susan Kittredge, taken from National Public Radio:
Like most women of her generation, my grandmother, whom I called Nonie, was an excellent seamstress. Born in 1879 in Galveston, Texas, she made most of her own clothes. Widowed at 43 and forced to count every penny, she sewed her three daughters' clothes and some of their children's, as well. I can knit but I cannot sew new creations from tissue-paper patterns. Whenever I try, I break out in a sweat and tear the paper. It clearly requires more patience, more math, more exactitude than I seem willing or capable of giving.

Recently, though, I have come to relish the moments when I sit down and, somewhat clumsily, repair a torn shirt, hem a skirt, patch a pair of jeans, and I realize that I believe in mending. The solace and comfort I feel when I pick up my needle and thread clearly exceeds the mere rescue of a piece of clothing. It is a time to stop, a time to quit running around trying to make figurative ends meet; it is a chance to sew actual rips together. I can't stop the war in Iraq,

I can't reverse global warming, I can't solve the problems of my community or the world, but I can mend things at hand. I can darn a pair of socks. Accomplishing small tasks, in this case saving something that might otherwise have been thrown away, is satisfying and, perhaps, even inspiring.

Mending something is different from fixing it. Fixing it suggests that evidence of the problem will disappear. I see mending as a preservation of history and a proclamation of hope. When we mend broken relationships, we realize that we're better together than apart, and perhaps even stronger for the rip and the repair.

When Nonie was 78 and living alone in a small apartment in New Jersey, a man smashed the window of her bedroom where she lay sleeping and raped her. It was so horrific, as any rape is, that even in our pretty open, highly verbal family, no one mentioned it. I didn't learn about it for almost five years. What I did notice, though, was that Nonie stopped sewing new clothes. All she did was to mend anything she could get her hands on as though she could somehow soothe the wound, piece back together her broken heart, soul and body by making sure that nothing appeared unraveled or undone as she had been.

Mending doesn't say, "This never happened." It says instead, as I believe the Christian cross does, "Something or someone was surely broken here, but with God's grace it will rise to new life." So too my old pajamas, the fence around the garden, the friendship torn by misunderstanding, a country being ripped apart by economic and social inequity and a global divide of enormous proportions — they all need mending.

I'm starting with the pajamas.

Each time I mend, I think of Susan Cooke Kittredge and her thoughtful commentary.

This is my work shirt that is in a constant state of "mending", because each time the shirt is washed, some of the vintage embroidery work frays. Those torn pieces are covered over with newer pieces of linens, be it hankies, pieces of antique tablecloths or napkins or even old table runners.

Just like the repairing of this shirt, I believe we are in a continual state of mending over wounds, be it in the loss of expectations or ways in which we have disappointed others and ourselves.

It is something to think about.

Sunday, January 11, 2009

Sharing Good Blogs


Many thanks to Swapna at her Cook and Craft blog for sending me a blog award. And when I opened an email yesterday, Cathy at Cate's Back Porch gave another. Thank you so much, Swapna and Cathy.

Reasons to receive blog recognition are:

... blogs who receive this award are exceedingly charming. This blog invests in the PROXIMITY in space, time and relationships. These kind bloggers aim to find and be friends. They are not interested in prizes or self-aggrandizement. Our hope is that even more friendships are propagated". The award recognizes the quality of the person writing the blog. I consider your blog to one of the best. You take the time to provide enjoyable tutorials. You are a giving talented person and I decided other people should know!

The Noblesse award is presented to bloggers who display consistency in any one or a combination of these conditions:

1. The Blogger manifests exemplary attitude, respecting the nuances that pervades amongst different cultures and beliefs.
2. The Blog contents inspire; it strives to encourage and offers solutions.
3. There is a clear purpose at the Blog; one that fosters a better understanding on Social, Political, Economic, the Arts, Culture and Sciences, and Beliefs.
4. The Blog is refreshing and creative.
5. The Blogger promotes friendship and positive thinking.
The Blogger who receives this Award will need to perform the following steps:

1. Create a Post with a mention and link to the person who presented the Noblesse Oblige Award.
2. The Award Conditions must be displayed at the Post.
3. Write a short article about what the Blog has thus far achieved- preferably citing one or more older post to support.
4. The Blogger must present the Noblesse Oblige Award in concurrence with the Award Conditions.
5. The Blogger must display the Award at any location at the Blog.

Nancy's arts and crafts is about creativity and making crafts. I try to research "how to" tips and give credit back to the people who have also found ways to use their talents in cooking, reading, crafts of all sorts, and artistic endeavors. I like to research the internet and give references to websites that are meaningful to the referenced subject.

Examples of some of my recent posts incorporating the above criteria are:

how-to-knit-moebius-scarf
paper-beads-used-in-earrings
how to make beads-and-sequin-ornamental balls
art-in-eye-of-a-needle

Thank you so much, Swapna and Cathy, for the awards. The deal is that I may now share the honors by linking to a few other interesting blogs. Just copy the pictures of the awards and pass along according to the rules to play in blogland. I'm passing the awards along to the following blogs written by the thoughtful, talented people:

freeprintablefun (Jamie Sue)
my_little_orange_kitchen
Cast-on blog
Mama Flo's

Friday, January 9, 2009

Making Knitting Markers Using Beads and Acorns

In a previous post about making knitting markers from beads, and with references given on a previous post, these colorful markers were made with beads and wires.

Having recently returned from South Carolina visiting with my daughter and her husband, we picked up lots of acorns from around the area. Many acorns were perfectly separated from the seeds, and looked like little leprechaun hats.

Although it is not a new idea, I decided to glue several atop a few wooden knitting needles, using Sculpey or Fimo clay and regular craft glue to hold them on securely.

The steps to making the acorn topped knitting needles are:


1) Choose your needles (NOT double points);
2) put a bit of malleable molding clay atop the end of the head, ensuring the acorn cap will easily fit over it after baking;
3) bake the clay on the needles according to directions on the clay (about 25 min.);
4) let the knitting needles cool, then adhere the acorns atop the clay with any good crafting glue.

Here is a pictures of the finished product using size 11 knitting needles :


This is an inexpensive craft, and one children will enjoy. You can read about a first grade teacher's project she accomplished several years ago with her students at Burrobird Blogspot. The children even made their own bamboo knitting needles. By now, some of them are possibly accomplished knitters, having been inspired to make their own tools.

Good job, Burrobird!

Thursday, January 8, 2009

mp3 holders or Cell Phone Neck Holsters


Over your shoulder or around your neck, these knit pouches are handy to hold keys, lipstick, and your cell phone or MP3 player. Off you go on a walk or quick trip to the grocery.

These little pouches can be used in many ways. Vary the dimensions according to your needs. (I made seven of them in different sizes!) Women's clothing is notoriously poor for providing pockets, so you might need to resort to making this as your own "pocket" to wear around your neck.

Materials: any DK weight yarn, ribbon yarns and purchased broaches and fur yarns for embellishment. A half ball of yarn makes a small pouch; size 6 or 7 dp needles; broaches for embellishment (optional)
Directions are provided at Fig and Plum.

For a long strap, you might want to try this simple technique described in Elizabeth Zimmerman's instructions to make the handle termed Idiot Cord I-cord. They are fun to make and can be used for a variety of purposes.

Tuesday, January 6, 2009

Epiphany and our Wedding Anniversary


My husband Gene, on his blog today, composed a collage of pictures of us from childhood and through the past nineteen years of our marriage. It is shared here.

We chose to marry on Epiphany for many reasons,
The term epiphany means "to show" or "to make known" or even "to reveal." In Western churches, it remembers the coming of the wise men bringing gifts to visit the Christ child, who by so doing "reveal" Jesus to the world as Lord and King.
but the symbolism for me was most apparent in that I was given a special gift of a wonderful husband on this day in 1990.
Let each day bring a new awakening. Happy Anniversary, Gene!

Friday, January 2, 2009

Dogs and a Bewildered Toad

In review of 2008 videos, this one was not posted. Remember all the greenery and warm weather, now that winter cold is upon us?

Music is by Iris DeMent.

Leg Warmers to Knit or Crochet

A comment left today on my blog asked for some help on finding a pattern for crocheting leg warmers. Now that it is winter, maybe this website is one you would like to visit, too. The pattern is also converted for knitting if that is your mojo.


(photo courtesy of vanillabeanknits) on Flickr.

Here is the website and the directions follow from their webpage: Legwear:
These leg warmers will be most appreciated in the dead of winter when temperatures plummet and winds wail, but be sure to have them crocheted and ready to wear.

Directions are given for size 9-11. You will need two 4 ounce, skeins of 4 ply yarn and sizes I and K crochet hooks.

Gauge: 3 hdc equal 1 inch

Starting at lower edge with smaller hook, ch 30, join with sl st to form ring, ch 2, do not turn.
Row 1: Sc in each ch, join with sl st in top of ch-2, ch 2, do not turn.
Rows 2 through 8: Repeat Row 1.
Row 9: With larger hook, ch 2, hdc in each sc across, join with sl st in top of ch-, ch 2, turn.
Repeat Row 9 to length desired, after last sl st, fasten off
Knitting pattern: "I didn't really use a pattern, I just used a little math and knit a 1 x 1 rib. I kept knitting until they were long enough to stretch up to my thighs if cold weather required." Courtesy of VanillabeanKnits

Thursday, January 1, 2009

How to Make Japanese Knotted Bags (borrowed instructions)

A few months ago, I was looking for a quick purse to make from fabric and came across an excellent tutorial created by Helen in New Zealand. Her complete instructions, including nice photos of her Japanese print bags, can be found at Japanese-knot-bag.

Only two fat quarters (if you are not a quilter, one fat quarter equates to very little fabric) are required to make this bag (photo courtesy of Helen):

She says about her shop where she sells hand crafted items:
Welcome to Show Your Workings. I like to recycle and re-purpose. I mostly work with fabric but also collect and sell vintage patterns and haberdashery. I'm trying to live a sustainable life in New Zealand with a small footprint, craft is a way of living sustainably and inventively (that's my excuse anyway!). I also write and blog at http://showyourworkings.wordpress.com/
Thanks for stopping by and supporting NZ handmade.
Her online shop can be accessed at Helen's Etsy Shop.

The process for sewing the purse looked so intriguing that I just had to try it. I am not finished with my Japanese knotted bags, but here is a photo of three sets of coordinating fabrics that will be used to make three different bags:

A couple of coordinating face pins in my jewelry stash will be added to the sides of the purses when the sewing step is completed.

One idea that I added to Helen's instructions for making the Japanese-knot-bag is this: use the plastic that comes atop any 2 lb. coffee can as the insert for the bottom of the bag. You will not even have to cut the plastic, because it is exactly the same size as the pattern piece. And you will be recycling plastic and going green.

If you are looking for another type bag to sew, you can go to another quick tutorial on making shopping bags at Free Crafts:Shopping-bag.

The entire cost of making one Japanese knotted bag was less than $5, including newly purchased fabric. They are the perfect size for holding a small knitting project, or just your car keys and a lipstick.

If you make one of these bags, please send me a picture of it, and I will post it on a future blog. Thanks!