Pages
Monday, June 30, 2008
Making Knitting Needle Knobs
This site, Flying Fingers, sells knitting accessories galore, and some with pretty embellishments on the tops of their needles. Lots of those unusual looking needles can be seen here.
Would you like to make some yourself? It is easy and inexpensive (about $1 per pair if you already own the wooden needles, and you will have lots of clay left over).
I looked up some references on making those pricey looking needle knobs and found a nice tutorial here: handmade_knitting_needles.
So I made a couple of knobs just for fun, and came up with a few unusual designs, one of which is shown in the photo on right.
Steps for Making Knobs:
1) purchase modeling clay in color(s) you desire (Sculpey is readily available;
2) work the clay until pliable and then mold in any desired shape;
3) place clay bobber on non-working end of wooden knitting needle;
4) bake in preheated oven at 265 degrees for 25 minutes, having knobs lay over edge of cookie sheet;
5) cool and polish with wet, fine sand paper, if desired
Be creative; you could go wild and your knitting buddies might take over your stock.
Friday, June 27, 2008
Making a Mosaic from Digital Pictures
You DO need to establish a Flickr account (free), or have pictures previously uploaded to a URL to use this program.
After uploading your favorite pictures, the program runs your personalized mosaic. Here is what MOSAICS generated for me from my Flickr "knitting stream":
Then I decided to be a bit more adventurous in making another mosaic, and used digital photos containing pictures of only flowers. Again, I uploaded my floral pictures of to Flickr from a previously saved file and created a new summer mosaic.
There are a number of applications where this program might come in handy. For instance, Mosaics would be a good source for making a Christmas card of favorite family pictures.
Stay tuned. Christmas is just around the corner.
##############################
A new painting completed!!
Here is a newly finished house-warming gift in oils which I finished yesterday for my sister-in-law, Kathy Kinsey. It is painted on a 16" x 20" canvas, framed in white wood (frame not shown). Belated congratulations on your new house, Kathy!
Thursday, June 26, 2008
Smocking and How to make Shell Smocking Ribbon trim
Click on the picture at the right to enlarge and read directions about how to draw up the ribbon for smocking. It creates an unusual and dressy effect for sewn edgings.... can be used on just about anything from a fun party dress to home decor like a pillow or edge of a curtain.
In 2004, my friend Kathy's daughter was welcomed and blessed into her church in a formal ceremony. I made a sweet white christening dress for little Ellen with a matching under-dress. The smocking method of drawing up fabric on the collar was used, with further embroidery on the collar and lots of lace eyelet added. (If I had known how to make shell smocking with ribbon back then, you can bet I would have employed that technique on Ellen's dress.)
Here is a picture of Kathy and Ellen in her christening dress (above), and then a close up (below) of the smocked collar.
It was lots of fun making this dress for a close friend and her very special daughter, who is now seven years old.
Kathy and Ellen, I'm coming to see you soon, and bringing clay for us to play with!
Wednesday, June 25, 2008
Embroidery with Vintage Apron Pockets, Watercolor Pencils and Crayons
So I cut out those pockets from the old apron to save them, adding an iron-on stiffening product called Wonder Under to the back of the pockets.
Fast forward a couple of days. In order to also preserve some of the old handwork already on those two pockets, I decided to find a retro looking picture which would incorporate that prior flower stitching into my new project (see upper left side of woman's scarf in the photo below for the vintage handwork). The white embroidery originally there on the pocket is difficult to see in the photo.
The dilemma was that the apron pockets were white, and the new fabric onto which they would be sewn had no coordinating white in the fabric.
How about making a yellow background for the pocket? That's the ticket! So I tinted the white fabric pocket with a mixture of yellow and orange crayon overlays (just coloring the background like you would color on a piece of paper).
Giggleface is the most thorough source I found in searching out ways to tint fabrics with crayons. An excellent tutorial is given there and is also the website where I learned how to color the pink for breast cancer ribbons on old handerchiefs in a previous post.
That same site also had a cute Roaring 20's face of a woman which would work perfectly for the pocket application. The face of the woman came from a pattern from Vintage-Tinted-Linens.
I also colored the flapper's scarf with watercolor pencils and crayons, and rouged her cheeks with the same products. (Full credit for the application of the colors of threads and techniques goes to Giggleface.)
Then I made two faces of the woman on two separate pockets, similarly embroidered, for my future project. Stay tuned into this blogspot and the project will be shown when completed.
Look to needlenthread for a video library of hand embroidery instructions in case you need a refresher course in all the hundreds of stitches that can be employed in embroidery.
Curiously Old Patterns is an extensive site for embroidery patterns over 120 years old, and is in the public domain. These images can be used without fear of copyright infringement.
This may give you an idea to get out those needles and embroidery floss long packed away, and have fun embroidering on a new project! It is definitely a handcraft which is coming back into favor.
Tuesday, June 24, 2008
Hummingbirds and Honeysuckle
Gardenhelper says
Honeysuckle (Lonicera) vines are easy to grow, vigorous, heat-tolerant, and nearly indestructible. The flashy and fragrant flowers will attract hummingbirds and butterflies all summer long. The resulting fruit of the Honeysuckle flower will provide a fall treat for your local songbirds as well.
Our back arbor is full of honeysuckle blooms now. The photo on the right was taken on June 21, Summer Solstice. This delightful blog from kviltstina in Sweden shows the author in her backyard at 1:30 AM (scroll down about halfway on the June 22 posting to see her on her deck with needlework).
And yesterday, I happened to snap a photo of this butterfly (below) that was among the blooms.
Why, yes, I believe it is, according to Science Daily. It is on its 3000 mile journey from Mexico. Maybe it will decide to settle here in our Colorado backyard. Too bad my hapless gardener husband cut down our butterfly bush a few years ago in his zeal for cleaning up debris (he thought it was dead).
Monday, June 23, 2008
Making Guest Soaps with Flower Petals
This video explains the process of making guest soap petals by dipping flower petals (fake or real) into melted soap to create individual little hand scrubs that are both pretty and functional.
This site says making soap
So where do you find the glycerin soap? Well, a cheap source to obtain glycerin is to buy a Neutragena soap bar, clearish rose in color, since it is glycerin with a few additives thrown in. Just visit the cosmetic aisle of any grocery or BigBox store, and a glycerin bar of soap can be purchased for under $2. Melting that bar on top of the stove at low heat will result in enough liquid soap to cover many more petals than I had patience. In other words, one bar of soap will cover lots of leaves.... can also be done with leaves. To do it using the melt and pour method of soapmaking ... melt about a cup of glycerin soap however you prefer (microwave or double boiler). Before you begin dipping the petals spread some wax paper on your work surface. Using tongs dip the petals/leaves into the melted soap one at a time and lay them on the wax paper to dry. Once dry remove from wax paper and they are ready to use. Rose Petals look great on display in a bowl in a bathroom near sink for use during the spring and around Valentine's day.
You could go whole hog and buy soap glycerin at the craft store, but you would end up paying five times as much. AND, you probably would be compelled to keep making soaps with a larger quantity of glycerin; that much concentrated effort would not be a fun experience to me.
Here is a picture of the "equipment" I used to make soap petals:
This is what I learned in this soap-making experience:
1. Real rose leaves turned greenish in color, probably because they got hot in the melted soap and become somewhat cooked;
2) Fake silk leaves work much better since they retain both their shape and the look like REAL leaves;
3) The colors on the silk flowers maintained their original dyed integrity;
4) My hands were well soaped after making the leaves, and the saucepan was thoroughly cleaned.
The finished soap leaves are shown here "setting" on waxed paper, and then they were transferred to a glass bowl shown on the far right. (The purple and white flowers are imbedded into the glass bowl container; it added a nice touch.)
Not only do the pretty individual hand soaps look nice in your guest bath, they also make a nice hostess gift.
Saturday, June 21, 2008
Socks with Beads Knitted In
The beads are plastic, but since I won't be throwing these socks into the dryer, they should hold up pretty well. That Noro (Japanese) yarn is great to work with. A pair of handmade socks is a real pleasure to wear, and you would never know that wool was next to your skin. The softness and its light weight are incredible.
Now on to making a pair of socks for our soldier friend in Afghanistan through the Sox For Soldiers see picture here program discussed in this YaHoo Group started by Kim, one soldier's mom.
Friday, June 20, 2008
Painting Flower Pots
If you go to that site, the instructions seem somewhat complicated. And they do not state that it is desirable to apply a gesso product on the clay pot prior to painting on the pot. It is advisable to paint on the clear product so that the paint won't soak into the clay.
This site gives excellent step-by-step instructions for preparation of the pot prior to painting. That same reference will further explain the importance of preparing the clay surface for paint.
The picture on the right upper corner is one from the Michaels website. Near right photo shows a flower pot which I painted two years ago (using a clay sealer undercoating), which has held up fairly well. I used oil paints on this flower pot, but acrylics also might be applied for a quicker drying time. (The painting on the flower pot to the right was taken from an original Linda Le Kniff drawing.)
If you were to paint on the newer heavy duty plastic pots, prep time would be quickly shortened.
Remember to spray a clear acrylic coating on the finished pot for a bright, clear finish.
Thursday, June 19, 2008
Using Oil Paint as Furniture Stain
1) Gather materials of tubed oil paint, mineral spirits, rags or paper towels, a container for mixing the stain (disposable), a stirring utensil (plastic fork), linseed oil, a little patience and elbow grease;
2) Now squeeze out about a two inch ribbon of paint from the tube and mix it with about a 1/4 cup linseed oil and 1 cup minerals spirits. The mineral spirits will help dissolve the oil and allow the paint to spread more easily.
3) Mix the paint, the oil and the minerals spirits really well. But don't worry if it does not have a thoroughly incorporated texture, because that is where the elbow grease comes in (by rubbing the paint mixture onto the wood);
4) Apply the paint, mineral spirits and linseed oil mixture directly to the wood. In this case, I purchased a table top from the local home improvement center;
5) Allow to dry for a few days as the linseed oil needs to soak into the wood;
6) Apply an acrylic protection over the stained wood - - even a spray acrylic covering works fine. Let the acrylic dry for several hours before final use.
The finished table topper is shown at the left as used on our pato to hold colorful summer annuals.
This particular batch of stain made enough to cover the table top, and to give a spring refreshment of stain and oil to the accompanying patio rocker.
Wednesday, June 18, 2008
Name to the Moon
Here is what I received as confirmation that I am going to the moon...Sign up to send your name to the moon. Names will be collected and placed onboard the LRO spacecraft for its historic mission bringing NASA back to the moon. You will also receive a certificate showcasing your support of the mission.
The deadline is June 27, 2008 for the submission of names.LRO's objectives are to find safe landing sites, locate potential resources, characterize the radiation environment, and demonstrate new technology.
Try the Lunar Reconnaissance Project link and add your name!Certificate of Participation
This certificate recognizes that Nancy McCarroll has joined the Lunar Reconnaissance Orbiter "Send Your Name to the Moon" Project
Date: June 15, 2008 Certificate No: 1297879
The Lunar Reconnaissance Orbiter is built and managed by NASA Goddard Spaceflight Center for NASA. "Send Your Name to the Moon" is a partnership with NASA, the LRO Project,The Johns Hopkins University Applied Physics Laboratory and the Planetary Society.
Tuesday, June 17, 2008
Corsets or "How to Make Your Own Girdle"
This picture and caption are too good not to use as a whimsical embroidery piece on a purse or quilt square."NOT ONLY HAVE I LOST MY SHEEP, THIS CORSET IS KILLING ME."
With the advent of Oprah and her endorsement of Spanx, corsets have made a comeback, but in a much more comfortable venue.
The owner and founder of Spanx is Sara Blakely. What a gal. She had a great idea, and produced a successful company making comfy, workable girdles. Blakely even gave back $1 million to the OprahWinfreyLeadershipAcademy in 2007 in appreciation for Oprah's bringing Spanx to public attention back 8 years ago.
Not wanting to take anything away from Sara, I found a less expensive alternative HERE which says:
Basically, you buy a pair of control-top pantyhose, cut off the legs, and you have made your own sized-to-fit corset. Granted, it would not look too attractive when undressing in front of your favorite person, but it could save some dollars.Starting at $25 a pop, they (Spanx) are a rather pricey solution to an embarrassing problem. But with some scissors, and old pantyhose, you can achieve the Spanx effect without paying the Spanx price!
Monday, June 16, 2008
Using Crayons & Watercolor Pencils to Tint Fabric
Trace your pattern onto your fabric very lightly with a pencil or a water soluble marker... Tape the fabric down on the corners to a flat smooth surface.Take out your crayons and color! You may need to color a little harder in the fabric because the ironing will soften the crayon. Experiment with shading to add depth or only color a few things to really make a bold statement. Try to color in the same direction because the strokes will show (unless this is the effect you are trying to achieve).But wouldn't it be easier to just embroider a design, and then color it in with crayon? Apparently, this option of "coloring within the lines" is a no-no, because in another thread discussion, Contadine said:
When you are satisfied with yourself, sandwich the fabric between 2 pieces of plain paper. Set your iron to the "cotton" setting. Press the fabric sandwich slowly and smoothly. This will 'set' the crayon. You may need to press a few times to get the results you want. I did mine a few times to soften and melt the crayon for a smoother effect. From this point you can either back the design with another piece of fabric or place in an embroidery hoop. Embroider your heart away! Use different stitches, beads, sequins, etc.
The possibilities are endless with this technique. Experiment, be brave, try new things!
You could stitch first, but that causes a few problems - You can't get right up tight to the stitching without getting some wax on the threads. Once you iron, that wax melts a little and makes your stitching look funny. If you scrub the piece heavily between ironing, you'll rough the threads up too much, and they'll look very fuzzy.When you iron, place a piece of copier paper on your ironing board, and then the colored fabric face down on it, and iron from the backside, or you'll get melted wax everywhere!OK, so now I was ready to try my hand at this. I pulled out some old fabric cocktail napkins from the 1940's which were still usable, and had nice hand-work on the edges.
Now for a design choice for embroidery...a pink ribbon since Relay for Life is a timely June topic, and I recently knew of a friend with a breast cancer recurrence who might need a "pick-me-up".
Here is a picture of five napkins with pink ribbons crayoned on them. The blue outline is a water soluble pen that I used for sketching the ribbons on the napkins. Then the napkins were ironed between white copy paper to take off some of the waxy color.
And here is the finished product on the right. The pinks came out pretty well, and I was surprised that so much color stayed on the fabric. A heavy embroidery floss in dark pink was threaded and used for the outline whipped stem stitch.
More examples of using crayons to tint fabric can be found at TheFlossBox. Another great source for embroidery patterns can be found at Needlecrafter. And I found some cute pictures drawn by Beatrix Potter through a Google search, and some transfer-worthy images of Peter Rabbit here.
Jemima Puddle-duck of Beatrix Potter fame will be my next quilt square for a baby blanket, and I plan to tint Jemima with watercolor pencils in blues for her hat and pinks and roses for her shawl.
Check out the Beatrix Potter website for delightful illustrations, and more about her life here at the BeatrixPotterSociety. If you are a fan of hers (like I am), you might be interested in seeing the movie Miss Potter. Renee Zellweger was the star, and it was a delightful film IMHO.
At VintagePatterns, an entire free catalog from 1886 of embroidery patterns is available on-line and in the public domain. This site is fascinating. Tutorials are also given of how to turn the patterns into usable designs.
And to think that our foremothers probably used some of these patterns on their lingerie!
Friday, June 13, 2008
Making a Mandarin Collar Several Ways
Here is a picture of a mandarin modified collar that I made on a linen blouse with a standard, large collar. It was further embellished with sewn on Cat Buttons:
Other ways to make mandarin collars is to use scarves, tying it in manners depicted in Scarves:
Mandarin collars cover a multitude of "aging skin" flaws. Crepey skin can be concealed, as well as double necks.1: Try a GQ oblong style! Fold a textured oblong scarf in half and place it around your neck. Feed one panel behind and then through the loop. Feed the other panel through the loop from the top. Finish the design by adjusting the panels. (Looks great over a jacket!);
2: Start by folding a large square scarf into a triangle. Place the folded edge next to your neck and tie a single knot. Twist the panels together. Wrap the twisted panels around itself and tuck the ends into the center, creating a rosette. Wear it off to the side or at the center of a collar.
In her later years, Kathryn Hepburn sure knew how to wear those turtlenecks well!
Thursday, June 12, 2008
Diary Project 2009
She published the 2008 Diary with the help of close to 400 artists who submitted their work free of charge. In her words:
The picture to the right is a submission from Lalootka. She also participated in the 2008 Diary Project.The Diary 2008 was designed by at least 365 artists and crafters around the world. All of them are web sellers and you can reach them by their webpage address on the bottom of their page. Each page correspond to a date. There is 7 address pages, 3 notes pages, 12 months page, 2 introduction pages, and 2 year pages. Total: 392 pages with different designs. It is BEAUTIFUL !
The cover is plain, so you can decorate it as you like.The CD contains the complete pdf file, ready to print, with instructions. On the CD you have both sizes, small diary: 4¼" x 7" and medium diary: 5½" x 8½".With the CD, you go to a photocopy center and you ask for the quantity of book you want, with the paper of your choice, the cover color of your choice, the color spiral of your choice, and the size you prefer between 5½" x 8½" and 4¼" x 7". It is free participation and a free publicity for you. You don't need to buy a book, but if you want one or more, all the participants will have a special price.
My submission for the 27th day of February in 2009 is shown below to the left.
It should be a fun project to have and to hold once it is published.
Deadline for submissions for the 2009 Calendar is July 1, 2008, so contact TheProject now if you are interested in contributing to this intriquing world-wide artist submission campaign.
Wednesday, June 11, 2008
Beading on Socks
Her YouTube presentation gives this visual and verbal explanation:
I searched out more information on the topic of "beading in knitting" and found a quick way to accomplish the same beading task. Knitty's website said:
Hooking beads onto individual stitches "as you go" is an outstanding method for those who hate to take the time and trouble to string loads of beads onto yarn it.
It is also great for spontaneous or accent beading, and also for yarns that are too delicate for the punishing strain that results from carrying a heavy length of pre-strung beads on the yarn. Beads are hooked on with a crochet hook small enough to fit through the hole of your beads.
Hooking beads onto stitches with a small crochet hook does not require juggling skills, although it may seem that way the first few times you try it. Since this method is so easy to learn from watching a demonstration, and so difficult to learn from words, here is a blow-by-blow description of my hooking method as it has evolved through hooking thousands of beads:
1) Impale the bead onto a crochet hook small enough to fit through the hole of your bead.2) Insert the hook into the stitch loop where the bead will sit, making sure that the hook is facing you.
3) Pull the loop through the bead.
4) Replace the stitch loop onto the left needle if necessary.
People are usually a bit afraid that they will drop the stitch when they try this technique. Be aware that the stitch loop does not need to come off the needle at all for the bead to go on. Even if it does come off the needle, as long as the loop has the crochet hook in proximity, you should be safe from it slipping into oblivion. And once the bead is seated securely on the loop, it isn't going anywhere. Once you feel secure about the process, you will no doubt be taking all sorts of liberties.
Here is a picture of my first sock where I used the above technique for impaling the bead onto the hook. Just the toe needs completion, and I'll have half a pair of beaded socks completed.
But on the next sock, I will bead ONLY on the knit stitches since the bead will be more prominent. (Beads seem to recede into the purl stitch.) Oh well, live and learn.
Tuesday, June 10, 2008
Beading: Asus Eee with Crystals & Mirrors
AK used Swarkovski crystals in fuschia, rose, light rose and aurora, in SS12, SS9 and SS5 sizes, gluing them to entirely cover the top of the case.
Using AK's tutorial, I decided to make my little Eee a pretty covering. Not only would it have its own T-shirt case, but it would also be personalized with initials. The T-shirt case was blogged about previously here.
First I sketched two calligraphy capital letters of "N"and "M" on the Eee top, using a ruler and approximating letter placement.
Since my Asus Eee has a light blue top, I used flat backed round crystals in small sizes in two different colors of turquoise and one dark rose color. I also purchased small mirrors at the craft store. Good old Wal Mart rounded out my accessories for the decorations with adhesive backed rhinestones (at a much cheaper price than those crystals). The heart-shaped BigBoxStore rhinestones are at the at the bottom of the initials, along with two earring fronts, tiny square mirrors, and more heart-shaped larger rhinestones.
The initials are painted with acrylics. Although the shadowing does not show very well, those crystals certainly brought out personalization in the middle of the letters.
I used a gel type glue; it was a mess to work with. But I was afraid Elmer's School Glue would not hold up to the light abuse which I tend to give my working machines.
This project took lots longer than I had anticipated, but at least my beading and painting efforts won't allow ownership confusion with any other Asus Eee that might be hanging around at the local coffee shop.
Note: Actual sizes are larger than they appear (the top is 5.5 inches by 7 inches).
Monday, June 9, 2008
Growing Indian Rope or Hindu Hoya
Dave says it can get 4-6 feet in height. This elderly plant has never grown over about 3 inches tall, but its weight does cause it to drape attractively.
Sunday, June 8, 2008
Therapy Dog Now Certified by TDI
Libby passed the qualifying steps of sitting and staying on command, being out of the owners' sight for three minutes without stressing, being able to accept strangers and their attentions, and being nonchalant around wheelchairs, crutches, walkers and crowds (among other tasks).
She will receive her "dog tag" with her picture on it, a laminated card similar to a driver's license, which she must wear at all times while on duty.
Libby also gained her American Kennel Club Good Citizen Award yesterday. Boy, does she look proud!
This is a picture of a 3 pound, 5 oz. Chihuahua who also was tested yesterday at the Mesa County Fairgrounds by certified TDI evaluator Cathy Clark.
And here is another photo from the TDI site of a therapy dog at play with a kiddo who seems to be enjoying the session.
Friday, June 6, 2008
Blog Search
Her blog is: "A place for knitting, stitching, quilting, rugrats and insane husbands". I came across it in a blog search using the word "knitting."
Reading the musings of others is fun, and I always pick up new ideas from crawling over different blogs.
It is interesting to observe others' calendars and see what they enjoy glancing at for a whole month...sort of a mini-intrusion into their thoughts. Voyeurism? Probably.
We'll see who wins the contest in a few days.
Thursday, June 5, 2008
Making Paints for Kids: Scratch 'n Sniff Watercolors
This really works!Art activities will stimulate your child's imaginations and enhance their creativity. Scratch 'n Sniff Watercolor paint is an entertaining activity that will leave them with a unique keepsake.
Things You’ll Need:
A Variety of Unsweetened Kool Aid mixes, the more the better!
Tablespoon, Warm water, Empty baby food jars, small cups, or a muffin tin, Paper, Paintbrush, Table, Newspaper or Plastic Tablecloth to cover the table, Smock or old clothing
Step1: Cover the table with newspaper or plastic tablecloth.
Step2: And 1 tablespoon of kool aid mix and 1 tablespoon of warm tap water into a baby food jar, small cup, or muffin tins. Repeat until you have enough of the desired colors that you would like.
Step3: Stir the paint.
Step4: Cover the child(ren) in a smock or old clothing.
Step5: Set the paint, paintbrush and paper out for the children to paint with. Enjoy!
Step6: Let painting dry overnight before scratching and sniffing. These paintings make a great gift for grandparents, baby-sitters and more!
Wednesday, June 4, 2008
How to Paint on Glass (Reverse Glass Painting)
Reverse painting on glass looks more complicated than it is. It requires painting a design on one side of glass that is viewed from the other side.
Materials: Traced or freehand design, Glass, Black acrylic-enamel paint, several colors of acrylic-enamel paint, long liner brush, small paintbrushes, water
Begin by choosing a design to duplicate. Trace the design or draw one freehand. Tape the traced pattern on the right side of the glass -- the side that will be viewed.
Use acrylic enamel (which is a permanent glass paint) and a long liner brush to begin painting the outline of the pattern on the reverse side of the glass. After main colors have dried, begin adding accent colors.
The DIY Network also gives this information:
Anything that is glass can be used to paint on. The plainer the glass the better to paint on. Do not let the painted glass sit in hot soapy sink for long because other objects bump up against it and can chip it. Just paint simple designs on your glassware. You do not want to cover the entire glass with paint, because part of the beauty of the glass is being able to see what is inside. Once you have painted your design on the glassware, let it cure for at least 24 hours. Make sure your oven is off and then put your glassware in and bake at 325 degrees for 30 to 40 minutes but no longer because the colors will change.
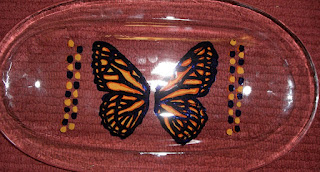
My friend Janet will be the recipient of this painted platter, even though she asked me to do this for her ages ago. Did you forget, Janet?
Tuesday, June 3, 2008
Look At Me Socks; pattern by Hedgehog NeedleArt Designs
I finished these "Look at Me" socks two days ago. The pattern can be found at Woolworks. The yarn is 100% wool, a superwashed fibre. The only objection I have with this pattern is that the calf part seems to be a lot larger than the sock fitted area. Maybe after a while, it will look like a slouch sock.
How to Get Your Own Word Cloud
The above is my "Word Cloud" generated free of charge from Snapshirts*.
You can get a word cloud generated from your personal blog or a blog that you like simply by clicking on "Custom" at their site (ignore the $18 fee unless you want something printed up using your Word Cloud). This company scans words from the url of the cited blog and alphabetically, but randomly, prints out selected words in different sized fonts.
It made me realize that the specific words in my cloud accurately express my interests since I frequently penned those highlighted words in my blog theme of arts and crafts.
For grins, I also tried out the url site of my husband's blog. And yep, but of course, his word cloud reflects what he thinks and writes about. I had to laugh, though, at some of the generated words he would not like to shout out to the world ("liberal" and "Hillary" to name a few). It got me thinking about other people and what their word clouds might look like...you get the drift.
And what do YOU mostly think about? What would your personal Word Cloud say? Pondering that thought might save you years in psychotherapy.
Snapshirts* even lets you "DESELECT" generated words, allowing for substitutions. What a kick that could be to start off with Snapshirt's selected words, and then come up with your own set.
I wish them good business off their innovative approach to the blog world; they certainly got a couple of my bucks.