Wednesday, October 1, 2008

How To Grow Garlic: Sow in Fall for Next Summer's Harvest

This household LOVES garlic. We cook with it daily. And we are always buying garlic from the supermarket. So why not grow this herb ourselves so we will have it fresh and available in the garden next season?

I figured it could not be too difficult to grow, but was surprised to learn that if I simply put garlic cloves into an area of the garden which receives good sun exposure, it could be planted in September or October.


Most people have never tasted freshly dug garlic -- the difference is as dramatic as a freshly picked vine-ripened tomato compared to a tasteless commercial tomato. The papery garlic in the supermarket was harvested last July and kept in storage. Fresh garlic is juicy, not dry. Use fresh garlic the same as you normally do: eat it raw, cooked, roasted, minced, or whole-- fresh garlic is delicious any way it is prepared. But do know that yes, a little fresh garlic goes a long way.
The fall is the right time to plan garlic, says this article:

Garlic is a member of the allium family which also includes leeks, shallots and onions. Individual cloves act as seeds. The bulbs grow underground and the leaves shoot in to the air. Although garlic is traditionally thought of as a Mediterranean ingredient garlic is also grown successfully in colder more Northern climates.

At home says:

To grow your own garlic, plant cloves in the fall. Cut off the scapes when they appear in the spring. A month or more later, pull a test garlic out of the dirt to see if it's ready for harvest. If it is, carefully dig up the heads. Wipe clean the heads with a paper towel (a very thin papery layer will come off), cut off the roots, store in a dry dark spot. Cook/eat as normal but use less until you understand its potency.


Here is my little corner of the world planted with garlic cloves.

We'll see what happens next July!
Monday, September 29, 2008

Peach Cobbler: Rolled Dumplings the Best!

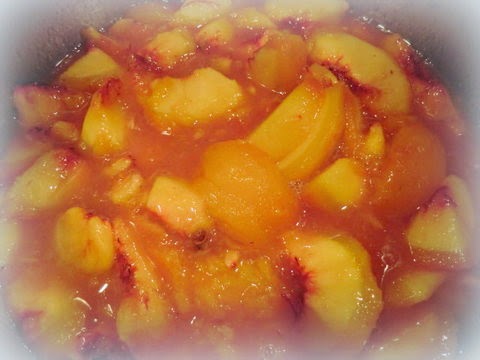
Ripe, lucious peaches are EVERYwhere in western Colorado this time of year. Sweet, juicy fruit picked straight from the tree of a friend was used to make our latest peach cobbler. Freshly grated nutmeg and cardamom make juices zing.


This season, I tried three recipes for peach cobbler and peach crisp. And the best recipe can be found at Cook.Com, in my humble opinion. Here it is:
OLD FASHIONED PEACH COBBLER
8 or 9 peaches, peeled and sliced
1/2 c. water
1 1/2 c. sugar2 tbsp. self-rising flour
Pinch of salt
1/2 c. butter, melted

Cook peaches in water until tender. Mix flour, salt and sugar. Add to peaches. Mix. Add melted butter.

PASTRY FOR COBBLER:1 c. self-rising flour
1/2 tsp. salt
1/3 c. shortening
4 tbsp. sweet milk, or enough to make a stiff dough

Blend flour, salt, and shortening to coarse meal texture. Add milk. Roll on floured surface. Pour half of peaches in 9x13 inch pan. Cut some dumplings and push dumplings down into the peach juice. Pour remaining peaches in and top with lattice strips. Bake in a 350 degree oven 35 to 40 minutes, or until top is golden brown. I like to sprinkle a little sugar on top before baking. This should be juicy cobbler, not dry.
This was my favorite because I prefer the rolled texture of the dumpling, and the fact that the self-created thickened sauce is similar to that of an apple dumpling.

A little vanilla ice cream doesn't hurt the taste!

Friday, September 26, 2008

How to Make a Fabric Broach (Christmas Flower)

Molly at Mollychicken gave an easy, fun tutorial on making fabric broaches. That tutorial is complete and easy to read, with great pictures. It gave me an idea for making a broach that I could wear with black and red colors.

Naturally, Christmas comes to mind with the reds and greens traditionally used for the season. I had lots of scrap fabric on hand, so the only fabric I purchased was 1/4 yd. of tartan plaid flannel. Total cost of the project was under $2.00, including the plaid fabric.

Molly says to use hessian backcloth for the broach. Not having any hessian fabric on hand, I resurrected an old piece of needlepoint backing for the broach base. It worked just fine.

I did not pull through the fabric strips, but instead, sewed them onto the pencilled-in concentric circles. Instead of using felt to cover up the stitching on the back, I recycled a plaid collar from a vest previously scavengered for fabric and trimmings. A circle of the plaid fabric was cut out to fit the back, then a clasp was sewn onto the circle, and the completed back was hot glued onto the backing. A more finished plaid backing was the result.
The other finishing step was cutting the ends of the fabric strips at a slant. This was done haphazardly with scissors, but pinking shears could also be used to make the ends look prettily frayed.

I also researched this site for information about making rugs with rag strips. It was a good read and gave me some more ideas about out how to make the Christmas flower broach.

Here is a picture of the back and the front of the broach, using red, green and coordinating colors in the fabric scraps:


The project was an hour well spent, and a different type of craft using old methods incorporating rug making and recycling.