Wednesday, June 11, 2008

Beading on Socks

Beads knitted into the cuff or body of a sock give a different look to women's foot apparel. Beading makes a pair of socks unique, and it really is fun to put them into knitting. Random Knits gives a step-by-step tutorial. She knitted up pink socks with girly beading, and her efforts look great! Take a look at her Beading on Socks tutorial; it is complete and well done, but seems a bit time consuming.

Her YouTube presentation gives this visual and verbal explanation:


I searched out more information on the topic of "beading in knitting" and found a quick way to accomplish the same beading task. Knitty's website said:

Hooking beads onto individual stitches "as you go" is an outstanding method for those who hate to take the time and trouble to string loads of beads onto yarn it.

It is also great for spontaneous or accent beading, and also for yarns that are too delicate for the punishing strain that results from carrying a heavy length of pre-strung beads on the yarn. Beads are hooked on with a crochet hook small enough to fit through the hole of your beads.

Hooking beads onto stitches with a small crochet hook does not require juggling skills, although it may seem that way the first few times you try it. Since this method is so easy to learn from watching a demonstration, and so difficult to learn from words, here is a blow-by-blow description of my hooking method as it has evolved through hooking thousands of beads:
1) Impale the bead onto a crochet hook small enough to fit through the hole of your bead.

2) Insert the hook into the stitch loop where the bead will sit, making sure that the hook is facing you.

3) Pull the loop through the bead.

4) Replace the stitch loop onto the left needle if necessary.

People are usually a bit afraid that they will drop the stitch when they try this technique. Be aware that the stitch loop does not need to come off the needle at all for the bead to go on. Even if it does come off the needle, as long as the loop has the crochet hook in proximity, you should be safe from it slipping into oblivion. And once the bead is seated securely on the loop, it isn't going anywhere. Once you feel secure about the process, you will no doubt be taking all sorts of liberties.

Here is a picture of my first sock where I used the above technique for impaling the bead onto the hook. Just the toe needs completion, and I'll have half a pair of beaded socks completed.

But on the next sock, I will bead ONLY on the knit stitches since the bead will be more prominent. (Beads seem to recede into the purl stitch.) Oh well, live and learn.

Tuesday, June 10, 2008

Beading: Asus Eee with Crystals & Mirrors

A traveling grad student showed a tutorial on covering her Asus Eee PC with crystals. Here is a picture of her beautifully blinged out PC. She explains about how she glued on Swarkovski crystals onto its top in AK's Blog.

AK used Swarkovski crystals in fuschia, rose, light rose and aurora, in SS12, SS9 and SS5 sizes, gluing them to entirely cover the top of the case.

Using AK's tutorial, I decided to make my little Eee a pretty covering. Not only would it have its own T-shirt case, but it would also be personalized with initials. The T-shirt case was blogged about previously here.

First I sketched two calligraphy capital letters of "N"and "M" on the Eee top, using a ruler and approximating letter placement.

Since my Asus Eee has a light blue top, I used flat backed round crystals in small sizes in two different colors of turquoise and one dark rose color. I also purchased small mirrors at the craft store. Good old Wal Mart rounded out my accessories for the decorations with adhesive backed rhinestones (at a much cheaper price than those crystals). The heart-shaped BigBoxStore rhinestones are at the at the bottom of the initials, along with two earring fronts, tiny square mirrors, and more heart-shaped larger rhinestones.
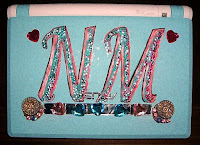
The initials are painted with acrylics. Although the shadowing does not show very well, those crystals certainly brought out personalization in the middle of the letters.

I used a gel type glue; it was a mess to work with. But I was afraid Elmer's School Glue would not hold up to the light abuse which I tend to give my working machines.

This project took lots longer than I had anticipated, but at least my beading and painting efforts won't allow ownership confusion with any other Asus Eee that might be hanging around at the local coffee shop.

Note: Actual sizes are larger than they appear (the top is 5.5 inches by 7 inches).

Monday, June 9, 2008

Growing Indian Rope or Hindu Hoya

For over twenty-five years, I have had this Indian Rope Hoya (or Hindu Hoya) in my home. It was given to me by a friend around 1983 when she was moving away from Colorado. The hoya is in the original container, and its potting soil has been changed a couple of times. Other than that, it remains pretty much like is was years ago except for its additional growth downwards.

It has grown many times its original size, and it has been divided and pieces given to other friends along the way. It requires very little water, not much light, and thrives on benign neglect.

Then last year, it bloomed. To my amazement and out of the clear blue, it actually bloomed. Shock upon shock, it is blooming again right now.

So I took a picture of the hoya it and did a little research on this plant.

Dave says it can get 4-6 feet in height. This elderly plant has never grown over about 3 inches tall, but its weight does cause it to drape attractively.

Below is a close-up of the little blooms that look like small ceramic flowers. If I had not touched them myself and known it was actually growing out of soil, I would have thought them to be pasted-on porcelain or clay molded blooms.

I've grown quite attached to this well behaved house plant. And it NEVER talks back.