Saturday, March 21, 2009

Knitting Terminology is Sometimes Confusing

While starting to knit a beginner triangular scarf from Meg Swanson's book A Gathering of Lace, two terms had me baffled in the pattern directions for the supposedly "easy" lace pattern. Those two terms were: "sl 2tog" and "p 2 sso".

Now, I knew what the terminology meant in terms of language, but the actual execution of the technique was open to interpretation. Remember the book Eats - Shoots - Leaves (Zero Tolerance for Punctuation)? ... the true meanings of words can be construed in several ways, as explained by the author of that classic little book.

These terms were driving me crazy! I knit it one way, then another, but which was the right way - the way the author intended?

So here comes my friend Google to the rescue: Respondent Fran said:

For the sl 2 tog kw, that means slip 2 together knitwise. To do this take your right needle and insert the point into the next 2 stitches on the left needle as if you were going to knit them. Slip them to the right needle.

For p2sso, that means pass 2 slipped stitches over. So, first your sl 2 tog kw, then knit 1 stitch. Then take the two stitches that you just slipped previously and pull both of them over the stitch you just knitted. As for visual aids, none found. Fran
Yea! The above archived response from four years ago popped up in the search engine that some nice person named Fran answered. (That same question was asked by someone else several years back which put her in a similar quandary. )

Happy as a clam, I'm tooling along on my "beginner/easy" shawl (a misnomer), executing those Sl 2 tog and p2 sso terms with a bit more confidence.
The lace scarf being knit is from the book A Gathering of Lace. This is the site where you can purchase it from Amazon.

Thursday, March 19, 2009

The Sisterhood of the Traveling Shawl

Have you heard about the The Sisterhood of the Traveling Shawl Project?

The Traveling Shawl is a pink lace shawl that will be knit by compassionate knitters in each of the United States, and travels from person to person in increments of three days per person until it has been completely knitted. It will then be raffled off in late 2009. All profits will go to the Susan Komen Foundation. This site states:

... The shawl will visit all fifty states of the US, with one knitter from each state adding 6-8 rows of intricate stitching. Upon completion of the shawl it will be won by someone who has donated to the Passionately Pink for the Cure campaign.

If you would like to be entered in this drawing, make a donation to our Traveling Shawl Team (ID # 3408007). Then forward your confirmation email to travelingshawl@gmail.com For each $5 donation you will be entered into a raffle to win the Traveling Shawl. If you'd like to join our Ravelry group, please visit us at http://www.ravelry.com/groups/traveling-shawl. You can also join our group on Facebook. Simply search Traveling Shawl.

And from the internet Ravelry Knitting Group:
This is about 50 Ravelry knitters from 50 different states...to document the journey of a traveling shawl. It’s journey will begin in Arkansas and once it has been passed to a knitter in every state of our GREAT country, it will return. We hope to accomplish this by October 2009.

For each $5 donation made to the Susan G Komen Foundation via our Donation Page you can be entered in our drawing to win a chance of owning the completed beautiful lace Traveling Shawl.

Everyone has been impacted in some way by breast cancer. Each entry will highlight the knitter, their state, and the person in whose honor or memory that they are knitting for. Enjoy the journey with us. Check out our blog. The journey has begun - share the news! Don’t forget to get your mammogram.
To follow the progress of the shawl, log in to The Traveling Shawl Blog. Today it is in Oklahoma.

Be generous and donate. Who knows, you might just win the shawl and be able to give it to someone who is in The Fight!

Monday, March 16, 2009

Try Decoupage with Wood Picture Frames

That useful product Mod Podge is a favorite medium when decoupaging. It is fast drying, and tough as nails. A little goes a long way with this finish, and sanding between coats of the varnish is not necessary.

In just a bit over two hours, I created two picture frames from unfinished wooden frame blanks purchased at the craft store. The frames cost between $1 and $2, depending on size.

There are many sources to learn how to make a picture frame using the decoupage technique. Check here and here for complete, easy instructions.

These two frames have an undercoating of blue acrylic paint. Then various photographs from the trip and a few post cards were used in the decoration of the frames, including maps and tour tickets as mementos. (You can tell that the recent New Zealand and Australia trip was good photo fodder for decoupage pictures.) There is even a whorl of indigenous possum and wool fiber incorporated into one of the frames that I am currently using to knit a lace shawl.

This is an easy and fun project to create for your favorite vacation photos that will incorporate even more memories preserved on the surface of the frame.

Saturday, March 14, 2009

Crafting Boxes and PaperDolls

Looking for a box template on the internet, I came across a variety of sources. One especially talented crafter came up with many different designs, including a template for making articulated paper dolls.

The directions given for making these creations are given for using card stock. You can enlarge the size to make almost any small box. This being said, I looked through my file of greeting cards which I save for just such a project, and came up with a sweet little bear card which I cut out, making a small puffy box to hold gifted handmade earrings. There is no need to purchase new card stock paper if you have a few cards on hand. (This is a good way to recycle your previously received birthday or other special occasion cards.)

Here is the template for a box made from cardstock from websource Mirkwood Designs for the puffy box:
Please note the restrictions:
Copyright 1999-2008 Mirkwood Designs, a division of ruthannzaroff.com. These templates are free for your use to make craft items to give or sell, to use for teaching purposes, or for submitting projects to magazines. I would appreciate it if you provide a link to my Web site. The templates themselves may NOT be auctioned, sold, or published in any way without my permission.
This adorable template could provide hours of fun for all age groups from children to adults. One of my blogpals, Diane at Dianes Mixed Art could go to town with her mixed media talents, making a spectacular work of art from this template, courtesy again of Mirkwood Designs:

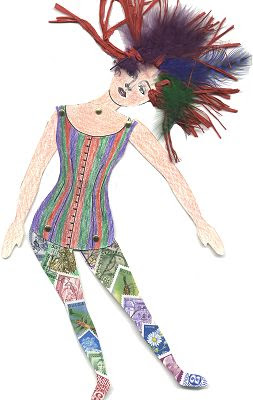
I am going to make this doll about 7-8" in height for an indoor potted plant, whimsically dangling from one of the leaves.

Here is the original template:

Wednesday, March 11, 2009

Salt Cellars and a Contest for Best Uses Today

Several cut glass anachronistic salt cellars were among my mother's prized what-nots in her dining room buffet. She used these little dishes as water holders when she painted with watercolors (a "no-no" in art instruction now, since one is taught to use large containers of water with this paint medium). As a child, I thought it odd that these little containers used to be set on the table for individuals instead of the larger salt shakers now in play.

Since I inherited these little glass objects, it was worth a look into their history. Here is some information about them:

This site gives a bit of history about salt cellars:
...historically, salt was a very precious and valuable commodity -- and salt was kept on the table in small but sometimes elaborate dishes known as salt cellars -- and just being able to afford salt was something of a status symbol. Where salt cellars were shared amongst a number of people at the dinner table, unless an individual spoon was not provided with the salt cellar, the proper way to take salt from the salt cellar was not with one's fingers but with the clean end of one's knife or fork (rather than the side that goes into one's mouth!).

Collectors of salt cellars even have annual conventions where they can meet, greet and purchase their favorite item of collection. This seems odd to me, but then again, I play tournament Scrabble, so who am I to say?

Salt cellars, also known as salt dips, open salts, and salt dishes, are not cellars at all, but an open dish, without a lid, that was used by wealthy families from the middle ages until WW II.
Now I'm in a quandary about how to best use these little salt cellars. Maybe I should.....

1) leave them out on the armoire in the evenings, and fairies could use them as wee bathtubs; or
2) perhaps they can be used as earring holders in the boudoir?;
3) or how about fire ants using them as a punch bowl for an outdoor picnic?

If you would like one of these antique salt cellars shown in the photograph, just leave a comment below about what you would do with one of them. I will pick a random respondent to receive one of these antique salt cellars, postage paid, with my compliments.

Don't you just love a contest where you have nothing to lose?


Monday, March 9, 2009

African Violets - Crowning Problem

In the state of today's economic and emotional downward spiral, let's talk about something positive: plant resuscitation. Case in point, our poor little African violet plant seems to be on its last legs. Its roots are above the soil about three inches, its leaves are drooping, and it looks like maybe this is the end of plant. But, wait! Maybe there is hope. After all, it was still blooming one week ago, so there may be a solution to this crowning problem; maybe it can be revived.

From The African Violet Factsheet, this source gives hope:
Repot violets about once a year, or when the leafless portion of the stem is about 1 to 1 1/2 inches long. Gently remove the plant from the pot with a paring knife. Remove all lateral crowns, leaving only the center crown. Trim off one or two rows of leaves, leaving a wheel of leaves around the crown. With the paring knife, scrape the neck as you would a carrot until all the brown plant material is removed and the neck is firm and green. Break or cut off the bottom half of the root. Have a clean pot ready for the pruned violet. Gently firm in new soil around the plant and water well. The pot should be one-third the diameter of the plant; a 4-inch pot is usually adequate.
Similarly, from Gardening Guide:
When it is time to repot, remove all crowns from your African violet except for the central one. Also, trim leaves from the plant, leaving a circle of leaves around the crown. Use a paring knife to scrape through the brown plant matter on the neck of your plant. When you see green, break off half the root and set your pruned African Violet into the pot, placing the crown just above the surface. Press the mixture firmly around the crown and water your plant well.
Alrighty, let's see what happens. Here is a picture of the sickly African Violet before, and after, transplantation into fresh potting soil especially designed for this delicate little guy.


Time will tell if these efforts of paring down the root and repotting the pruned plant will bring it back to better health. More pictures to follow in the future ... let's hope it survives.
The final replanted violet, the crown pruned, its roots tamped into fresh soil, re-watered, but still in need of its bottom leaves pared down to a circle:

Friday, March 6, 2009

Embroidered Fairy


Today is "Show & Tell" over at Kelli's House, and the fairy painted, sewn and appliqued on a baby pillow case is my Show and Tell, previously blogged about here in July.

Please visit Kelli's House for more spring pretties. She has some sweet bunnies on her blog today. And have a nice weekend; maybe take a Sunday nap to catch up on your lost hour of sleep?

Thursday, March 5, 2009

Needle Felting: Who Knew?

Perusing email this morning, my update from Knitting Daily discussed needle felting, a craft which has not yet become one of my crafting obsessions. Here is what Sandi Wiseheart, Editor of Knitting Daily had to say today. It spoke to me!

I made a vow with myself several years back: I Will Not Get Into Needle Felting. I figured I had enough "hobbies" (let's just be honest and call them"obsessions," shall we?) and I didn't want any more reasons to spend money that might detract from my knitting stash expansion efforts. Plus...I know myself. I love all things crafty. I just thought it wise not to add one more obsession to my already craft-crazed psyche.
My crafting interest aroused, I just had to Google "needle felting" and came up with two quick and easy tutorials on YouTube. The first video gives a textbook approach to making a more structured applique, while the second video is valuable in its approach to free thinking needle felting.

After watching these videos, I am running down to Michael's this morning to get a needle punch. All the rest of the materials are on hand (use Styrofoam for the board: much less expensive). Thus,my little needle felting project should be completed before dusk. (Libby and I do have to make a few therapy visits after the run to the craft store.)


Here is a helpful book:

Simply Needlefelt
Jayne Emerson
Paperback
Item #: 09FE01
ISBN: 978-1-59668-108-8112

Tuesday, March 3, 2009

Therapy Dog Has Letters after her Name!

Back in June, Libby the Maltipoo was certified by Therapy Dogs International. A LOT has gone on regarding her work status since last summer. She has been a very busy pup with her visitations.

A slideshow of Libby's Typical Work Day, complete with music, can be viewed here:
Kenny Chesney singing "Shift Work" as background for Libby's Work Day.

And, after fifty (yes 50!) times that she has made rounds visiting patients at hospitals, nursing homes, assisted living centers and our local Regional Center, she has now attained her credentials of "TDIA", standing for "Therapy Dog International Active" status.

In a letter received yesterday from TDI based in Flanders, NJ, she received this message that says, in part:

In creating the TDIA title, it was our intent to inspire more members to actively participate in therapy visits. We encourage you to continue this important work, documenting your next 100 visits for your... (next certification which terms her as an outstanding volunteer).
A certificate of Achievement was presented to Libby Sweetpea, and that is now displayed on the refrigerator in our kitchen.

Here is Libby looking proud:
A little more about the Therapy Dog Program and requirement for the dogs:

In 2007, over 15,000 handlers and approximately 18,000 dogs were registered with TDI. Libby passed the qualifying steps of sitting and staying on command, being out of the owners' sight for three minutes without stressing, being able to accept strangers and their attentions, and being nonchalant around wheelchairs,crutches, walkers and crowds (among other tasks).

Keep on trucking, Libby!

Monday, March 2, 2009

Yarn Weights Explained (courtesy of Meg Swansen)

In her iconic book A Gathering of Lace, first published in 2000 and with a cast of 34 fiber artists, Meg Swansen explains the differences of yarn weights clear at the back of the book. Mind you, it took a few hours to get there since the lace projects are intriguing to review, but when I found the chart (copied above), this was a revelation to me.

For a long while, I thought a "DK" weight yarn was the abbreviation for "Double Knit". Thanks to a chart I found in the back of this delightful book, I learned the exact size and look of a DK weight yarn, as well as other sizes of yarns.

The chart pictured above can be found on page 165 of the book A Gathering of Lace. Here is the site where you can purchase it on Amazon.One more trick that I learned from this book is quoted from page 4 of the book:

When it comes to joining in a new ball of wool, the usual methods are not very satisfactory for lace knitting.. (but) splicing... when done done properly, ... is totally undetectable. If you have a 2-ply wool, separate the last few inches of the old skein into its individual plies and break off (do not cut) one ply several inches from the end. Repeat this procedure on the end of the new skein. Now overlap the two ends in your left palm, moisten your right palm (spit does work better than water) and rub your palms together briskly for 5 to 10 seconds...or until you can feel heat. You have fused the fibers and, because you broke off one of the plies on either end, the diameter of the wool remains constant.
Let me tell you, this method works! The fusion is invisible from either side of your knitting.

Here is a picture of a the Clair lace shawl (pattern can be found here), compliments of Vyonne Senecal on Ravelry, where this method of splicing yarns was applied yesterday as I was knitting a shawl with the new possum and wool fur from Dunedin, New Zealand.

About half way up the thirty rows of knitted lace shown in the picture, I had to splice together two balls of yarn. Using Swansen's technique of splicing yarn, there is absolutely no detection of where the splicing occurred.

This was an idea too good not to share!