Showing posts with label recipes. Show all posts

Tuesday, November 24, 2009

Cranberry Relish by Susan Stamberg

While listening to NPR the other day, I heard about this famous recipe for cranberry relish.

Now don't turn up your nose immediately when it turns out that besides fresh cranberries, it also calls for a small onion and a good bit of horseradish.  Ruth Reichl, former editor of Gourment Magazine and author of a number of books centered around food, was talking with Susan Stamberg about this shockingly pink relish.

Here is the link to this fun story, along with the original recipe:
* 2 cups whole raw cranberries, washed
* 1 small onion
* 3/4 cup sour cream
* 1/2 cup sugar
* 2 tablespoons horseradish from a jar ("red is a bit milder than white")
Grind the raw berries and onion together. ("I use an old-fashioned meat grinder," Stamberg says. "I'm sure there's a setting on the food processor that will give you a chunky grind, not a puree.") Add everything else and mix. Put in a plastic container and freeze.
Early Thanksgiving morning, move it from freezer to refrigerator compartment to thaw. ("It should still have some little icy slivers left.")
The relish will be thick, creamy and shocking pink. ("OK, Pepto Bismol pink.")
Makes 1 1/2 pints
I just finished making some, and it is SURPRISINGLY refreshing.  Of course, my conservative husband and his family are into the jellied cranberry sauce out of the can, so I will probably be the only one enjoying this little relish.  Sigh.  What's a gal to do but make herself happy?  ... and pawn off five little sacks of this taste treat to my friends this morning!


Wednesday, November 11, 2009

Tahini Sauce and Hummus: Quick Snack Recipe

Here was this new jar of tahini sauce on the pantry shelf, and it had not yet been opened.  It was just waiting for me to make this hummus recipe sent by friend Lynda in Wisconsin.  She found it in Cooks Illustrated (May, 2008).  Apparently she uses this recipe source often.

From what the recipe indicates, the problem with most hummus is that it has a course, dense consistency caused by the tough skins of the chickpeas.  The solution is to use canned chickpeas, not fresh garbonzo beans.  Not a problem since there was also a can of chickpeas patiently waiting on that same pantry shelf. 

But the REAL secret for smooth hummus is to emulsify the beans in a blender while slowly adding olive oil.
Here are the ingredients:

3 tablespoons juice from 1 to 2 lemons
1/4 cup water
6 tablespoons tahini , stirred well
2 tablespoons extra-virgin olive oil , plus extra for drizzling
1 (14-ounce) can chickpeas , drained and rinsed (see note)
1 small garlic clove , minced or pressed through garlic press (about 1/2 teaspoon)
1/2 teaspoon table salt
1/4 teaspoon ground cumin
Pinch cayenne
1 tablespoon minced fresh cilantro or parsley leaves

Instructions:

1. Combine lemon juice and water in small bowl or measuring cup. Whisk together tahini and 2 tablespoons oil in second small bowl or measuring cup. Set aside 2 tablespoons chickpeas for garnish.
2. Process remaining chickpeas, garlic, salt, cumin, and cayenne in food processor until almost fully ground, about 15 seconds. Scrape down bowl with rubber spatula. With machine running, add lemon juice-water mixture in steady stream through feed tube. Scrape down bowl and continue to process for 1 minute. With machine running, add oil-tahini mixture in steady stream through feed tube; continue to process until hummus is smooth and creamy, about 15 seconds, scraping down bowl as needed.
3. Transfer hummus to serving bowl, sprinkle reserved chickpeas and cilantro over surface, cover with plastic wrap, and let stand until flavors meld, at least 30 minutes. Drizzle with olive oil and serve.

Lucky for us that our parsley is still growing outside and was available for garnishment.  No pita bread in the cupboards, but Fritos worked just fine with the hummus.
 
Thanks, Lynda, for this superb recipe.

Friday, September 25, 2009

Spiced Tea that Keeps Forever (low calorie)

Edible gifts are usually appreciated, and it is always a good idea to keep a bit back for your own survival purposes.  More jarred mixes were previous posted here for cocoa, risotto rice and peanut butter cookies.

This is a recipe I found on the internet at the Cook Site that calls for:
2 c. Tang
2/3 cup instant tea
2 (3 oz.) pkgs. lemonade mix
2 1/2 c. sugar
2 tbsp. cinnamon
1 tbsp. cloves
The "old recipes" that I had from back in the day called for Tang (not an easy product to find these days on grocery shelves...and expensive!) and presweetened Kool-Aid, also not available at the three major grocery chains in our neighborhood.  The old recipes also called for lots of sugar.

This as about the closest I could come up with for a general mix to use for gifts to give our produce laden neighbors who were generous to share with us their summer squashes and tomatoes. In rough proportions, this will yield a spiced tea mix for about 8 cups of dry spiced tea, using aspertain sweetened products:
1 can of pre-sweetend instant tea with lemon flavor
2 small cans of Tang ( you really have to look for this product at your local grocery)
1/2 can of pre-sweetened lemonade (or several little packs of Crystal Lite lemonade)
1 Tbsp. cinnamon (no cloves for me)
Add about two tsp. of the mix to a cup of hot water, and the taste of fall is on your tastebuds!


Wednesday, July 8, 2009

Mint in Dips and Salads

Tons of mint are grow in our back. What to do with it? From Indian Food Forever:

1 bunch fresh mint leaves
2 green chillies
1 tbsp tamarind pulp
Salt to taste, a little water

How to make mint (pudina) chutney :
To make tamarind pulp soak a little tamarind in water and keep aside for 2 hours. Then strain the mixture in a bowl with the help of a spoon. To make tamarind juice add a little water to the pulp. These days ready made pulp is available in the market.

Wash the mint leaves well. Grind it to a smooth paste with green chillies, salt and tamarind juice. You can add water if the mixture is thick.

This mixture is similar (or the same) to that green dipping sauce served with appetizers at Indian restaurants. It is delicious with Frito's!

And from Lowfat Cooking:

A bright green salad of sugar snap peas and sweet green peas in a light, mint dressing. Cook Time: 2 minutes

Ingredients:
2 1/2 cups frozen peas
1 pound sugar snap peas, strings removed
2 tsp sugar
2 tbsp
white wine vinegar
1 tbsp extra-virgin olive oil
1 tbsp lemon juice
1/4 cup freshly chopped mint

Preparation: Bring a large pot of water to a boil. Add frozen peas and snap peas, and cook for 2 minutes. Drain and rinse immediately with cold water to stop cooking, and empty peas into a large bowl. In a small bowl, combine sugar, white wine vinegar, olive oil lemon juice and mint. Drizzle over peas. Toss, then refrigerate for 2 hours. Serves 8

Per Serving: Calories 83, Calories from Fat 17, Total Fat 2g (sat 0.2g),
Cholesterol 0mg, Sodium 53mg, Carbohydrate 12.6g, Fiber 3.8g, Protein 4g

Here is a picture of this refreshing summer pea salad with mint sauce:

Another summer salad shown below is my husband's invention and can be found at his weblog recipe for pasta primavera salad. (no mint in this salad)


And here is our Tuesday Ladies' Auxiliary yesterday after our salad repast. Let's do it again soon, friends.

Friday, June 19, 2009

Microwave Baked Potato Fabric Bags

Have you tried a cloth bag for baking potatoes in the microwave?

Potatoes baked in the fabric really are delicious, and have a different texture than the usual baking process from sticking a naked potato in the microwave.

There is no trick to it (other than using the bag); just wash and dry potatoes. Then wrap them in a paper towel. DO NOT PIERCE SKIN! Place potatoes in bag and microwave, as usual, for about five minutes (for one potato) or until done. You can put up to four potatoes in one bag. Remove the potato(es) from the bag and fluff with a fork, applying your favorite slathering of fattening delicious toppings. They taste like those slow roasted stuffed potatoes popular on restaurant menus.

If you want to get one for yourself or as a gift, you can purchase a baked potato bag here at Country Collectibles Microwave Bakers on the internet.

Or make one yourself with directions from Garden Web.

I was lucky and received one from a relative. This is the one she made: Baking potatoes in a bag is a novel idea, and the potatoes are delicious...there must be some magic in the process!

Tuesday, June 16, 2009

Creamy Pesto Chicken and Pasta

Here is an easy and quick recipe using pesto sauce with chicken and pasta. How can you go wrong with those ingredients? I came across this recipe over at Purpled Sky's blog a few months ago. It is tasty! (Feel free to use chicken thighs instead of chicken breasts for more flavor.)


Creamy Pesto Chicken Recipe

2 chicken breast fillet, quartered and sliced ...or dark meat!
1/2 tsp salt
2 tbsp olive oil

Prepare chicken slices thick or thin enough for a quick pan fry. Season with salt. Heat olive oil in a non-stick skillet. Fry chicken slices until brown.

1 tbsp olive oil
2 cloves garlic, grated
1/4 cup chicken stock
1/4 cup creamer
3 tbsp pesto sauce
pinch of salt

In the same pan, heat olive oil. Saute garlic. Once fragrant, pour in stock. Bring to a soft boil. Add creamer little by little, stirring as you do. Turn off heat; then add pesto sauce. Season with salt.Place the pan-fried chicken slices onto the pan and turn the heat back on. Coat the chicken slices with sauce. Once the sauce starts boiling again, turn off heat.

Boil up your favorite pasta or risotto. Serve atop the starch. Yum.

It is almost time to make bunches of pesto sauce for freezing. This post explains how to make up basil or arugula pesto to freeze and use later.

Thursday, May 21, 2009

Mint Sauce Recipe

We hit the jackpot on mint in our yard! Yes, it is everywhere, and even places where it is not welcome - as in our garden areas. It does hold down the soil on an incline in the back yard, so eradication is out of the question. And on the positive side, it smells so sweet after a lawn mowing.

So what to do with all this fragrant herb? Here is a great post I'll be using from All Free Crafts.

Mint sauce makes an excellent condiment to use with lamb chops, pork chops, and to flavor new potatoes and peas. Here is the recipe:

Ingredients:
1/2 cup finely chopped fresh mint leaves
1 cup malt vinegar
2 tablespoons white sugar
small bottles for storage
Mint

Sauce Instructions:Rinse young, healthy mint leaves, strip from the stems, and chop into fine pieces. I usually process most of the leaves in the blender, with a little of the vinegar, leaving some aside to chop by hand. The leaves chopped in the blender will be very fine, and infuse a fine flavor, while those done by hand are a little coarser and will be more visible in the decorative vinegar jar. Bring vinegar to a simmer in a small saucepan, add sugar and chopped leaves. Simmer for about 20 minutes to infuse. Add more sugar or add a little water to taste, depending on how strong or how sweet you want the sauce. (I add no extra water or sugar to this recipe, but you may prefer a less strong infusion.) You can re-use lots of different bottles for mint sauce...narrow jars look elegant, but short, squat jars allow you to use a spoon to serve the mint sauce.

Make sure the bottles are free of nicks or cracks and seal able with either a screw top or cork. Wash containers thoroughly, then sterilize by immersing the jars in a pan of hot water and simmering for 10 minutes. Once jars are sterilized, remove from the simmering water and invert on paper towel to dry. Fill while the jars are still warm and seal tightly. If using corks and you intend to store the vinegar for an extended time, seal the corks by dipping in paraffin; if using a screw top, place a small square of waxed paper on top of the jar before screwing the lid on tight. You can add a small fresh sprig of mint to your jars, if you wish, for visual appeal - just insert into the jar before adding the mint sauce. Use a funnel to add the sauce, stirring as you pour it into the funnel to make sure you get lots of mint leaves mixed with the vinegar. You'll find that the mint settles to the bottom of the jar, so the mint sauce should be gently shaken or stirred before serving. Vinegar has natural preservative qualities, and mint sauce should keep for 2 to 3 months in cold storage or for 6 to 8 months in the refrigerator.

Friday, March 27, 2009

Cooking in An Economic Depression

Looking for information about cooking in "hard times", you might find this 91 year old woman's recipe and remembrances thought provoking. Take a listen to her YouTube presentation on cooking a potato, adding a can of peas and then adding pasta to make a filling dinner for a family of four. Now that is saving a dollar!

Then there is this post from a fellow from Texas who said:

Never been to a DollarStore ? I have, and not just because I've been down on my luck financially. Dollar stores often are just where you need to go when your regular stores are closed or out of stock on a standard household item.They offer one-stop shopping, convenience and basic value in a crunch.

His post talks about buying food at a DollarStore, among other things, and is worth a read.

Another site you might like to visit is this: Menus for Moms Cooking in Hard Economic Times. This article puts things into a realistic perspective.

Monday, February 16, 2009

Lemon Tart with Rosemary and Strawberries

Ok, it's about time for a recipe.

The man of the house reaaaaallllllly enjoys cooking. And he is good at it. But every now and then, a dessert is nice. He does not bake, so that excursion into food decadency is left to me.

This recipe from Woman's Day Magazine caught my eye. Perhaps it was the fresh rosemary leaves in the tart shell that seemed like an interesting combination in a pastry.

Here is a picture of the featured dessert "Lemon Tart with Strawberries", courtesy of Woman's Day.


If a list of ingredients calls for sweetened condensed milk, it MUST be tasty! The ingredients are shown below, in case the picture whets your appetite, and all the instructions can be found here at Woman's Day.

Tart Shell: 1 1⁄4 cups all-purpose flour
1⁄4 cup confectioners’ sugar
1 Tbsp freshrosemary leaves
1⁄4 tsp salt
1 stick (1⁄2 cup) cold unsalted butter, cut into pieces
1 large egg yolk mixed with 1 Tbsp water

Lemon Filling: 1 (14 oz) can sweetened condensed milk
5 large egg yolks
2 tsp grated lemon zest
1⁄2 cup lemon juice

Decoration: 12 strawberries, hulled and halved
Our tart did not finish up quite as pretty as the professional picture, but it probably tasted just as fine. Man, was it good!

Any by the bye, there are 400 calories per serving. Sigh.

(Picture found at Flickr.)

Monday, February 9, 2009

Making Suet Cakes for Birds

Even birds like food treats, especially in the winter. From Feeding Birds, here is an easy homemade suet cake that your birds might enjoy now:
Making homemade suet cakes is simply a matter of melting fat down to a pour-easy consistency, adding a few ingredients of your choosing, then pouring the mixture into a mold. The shape of the mold is determined by the type of suet feeder you'll use.

If you are using lard or shortening for homemade suet cakes, adding equal parts of peanut butter flour will help maintain correct consistency of regular suet cakes.

To this warm and pour-able mixture you could add rolled oats, bird seed, cornmeal, raisins, unsalted nuts and anything else you think the birds would enjoy. Then, pour your warm suet 'soup' into the mold (a bread pan where you could slice off bits for your store bought suet feeder, cupcake tins that you could pierce with wire and hang from a tree, etc).
This little guy was photographed Saturday by Jack Heniford in South Carolina:

Cardinals (redbirds) are attracted to sunflower seeds and safflower seeds, according to Plant Answers.

Let me know if you have success with feeding birds, and what type feeder you have.

Tuesday, December 23, 2008

Sugar Cookies and Wilton Color Mist Food Color Spray

Those beautiful cookies were taken from a Pillsbury website. Wish I could take credit for them, but the Pillsbury Dough Boy cranked those out and put the picture of those festive creations on Google.

However, today was our day for making sugar cookies from good old Betty Crocker's recipe. The original version of the 1950's recipe can be found at The Recipe Link, or use your favorite recipe printed in any basic cookbook containing desserts.

A new product (for me, at least...you probably have used this before in your decorated concoctions) which graced the top our plain sugar cookies was this: Wilton Color Mist Food Color Spray in a 1.5 oz. aerosol can.

This easy-to-use spray gives decorators the versatility and dazzling effects of an airbrush in a convenient can!
Creates a rainbow of excitement on so many desserts
Use it to transform a plain iced cake with sensational color, add splashes of holiday color to iced cookies and cupcakes
Great for party desserts--highlighting whipped topping or ice cream with color
No mess, taste-free formula; add a little color or a lot
Choose your colors (... 8 colors)
Certified Kosher
And they turned out like this after I used the green color mist spray atop the unbaked cookies:

Not quite like professional results, but they tasted pretty sweet!

I'll be away from posting until next week. Merry Christmas to all!

Sunday, December 7, 2008

Recipe Exchange: It Worked!

Usually, I ignore emails about "do this and you will receive (fill in the blank)". But last week, an email came through that was too, too easy for a quick reply, so I responded with a recipe within a minute. Wow! The response to that email request was almost overwhelming in the number of reciprocated recipes, so I was really pleased that I had emailed out that quick reply recipe (it was already on a saved word processing document, anyway). Some of the recipes that came back to me are printed at the end of this post.

Let me share what the email said, and you might want to start your own recipe exchange, using or modifying this wording:

You have been invited to be a part of a recipe exchange. Please send a recipe to the (2 emails you list) 2 people whose names are listed below (even if you don't know the person in the first space, I do...) and it should preferably be something quick, easy and without rare ingredients. Actually, the best one is one you know in your head and can type out and send right now.Then, copy this letter into a new e-mail, move my name to the number 1 position and put your name in the number 2 position. Only my name and your name should show when you send your email. Send to 20 friends. Seldom does anyone drop out because we can all use new recipes.

The turnaround is fast because only 2 names are on the list. THANKS!

Here are some of the recipes I received:
Jello dessert

Stir 1 1/2 cups boiling water into 2 packages (3 oz. size) Orange Jell-O gelatin in large bowl until completely dissolved. Add enough ice cubes to 1 cups cold orange or cranberry juice to make 2 cups. Add to gelatin, stirring until partially melted. Blend mixture in blender on medium speed for 30 seconds. Spoon 1 can (11 or 15oz. dole mandarin oranges, drained) into large glass bowl or 10 dessert glasses. Slowly pour blended gelatin mixture on top of fruit. Refrigerate 45 minutes or until set. The mixture sets with a frothy layer on top and a clear layer on bottom. Makes 10 servings. Can be made up to 1 day ahead.

Cherry Cheesecake

1 LG. PKG. CREAM CHEESE (AT ROOM TEMP): BEAT WITH ELECTRIC MIXER..SLOWLY ADD 1/2 CUP MILK - CONTINUE BEATING, SLOWLY ADDING ANOTHER 2 1/2 CUP MILK - BEAT UNTIL ALL LUMPS ARE GONE. ADD 1 LARGE INSTANT VANILLA PUDDING, BEAT UNTIL THICKENED. POUR INTO BAKED GRAHAM CRACKER CRUST. TOP WITH CANNED CHERRY PIE FILLING.

Carolina Barbecue (From my South Carolina Son-in-Law)

Take a good hunk'a pork like a butt er' a shoulder.
Rub it with salt brown sugar papriker and black pepper
Stick it in the oven at about 250 degrees for a good long time, 'bout 5 hours.
Make a sauce outta 'bout a half cup o' mustard, about that much ketchup, too , brown sugar bout half cup o that, clove a' garlic an' a cup a' vinegar.
When yer pork comes out, shred it off the bone with forks or meat cleavers. Put on about half the sauce save the rest for adding later if'n ye want. Let it marinate couple 'a hours. Reheat by the serving in the micro, serve on buns with slaw on the bun and hushpuppies.

Dangerous Chocolate Mug Cake
In a coffee mug mix:
1/4 cup flour
1/2 cup sugar
2 T baking cocoa
1 egg
3 T milk
3 T oil
3 T chocolate chips
a splash of vanilla
nuts (optional)

Mix well and place in microwave. Cook 3 minutes on high. Cake will rise over top of mug, so don't be alarmed. Allow to cool. Eat, serves two or three if you want to share.


Easy Chocolate Pie
1 Large Hershey bar + 1 smaller Hershey bar
15 Marshmallows
1/2 cup milk

Heat the above in a double boiler or in the microwave until melted. Mix and let cool,
Then add 1 cup whipped cream (I use whipped topping.) Fold in the whipped cream or topping and pile into a baked crust. Top with whipped cream and shave chocolate over the top. Refrigerate.

Cranberry Nut Bread

2 cups plain flour
1 1/2 teaspoons baking powder
1/2 teaspoon baking soda
1 tablespoon grated orange peel
1 egg, well beaten
1 1/2 cups fresh or frozen cranberries, coarsely chopped
1/2 cup chopped nuts
1 cup sugar
1 teaspoon salt
3/4 cup orange juice
2 tablespoons shortening

Preheat oven to 350 degrees Fahrenheit. Grease a 9 x 5-inch loaf pan. Mix together flour, sugar, baking powder, salt and baking soda in a medium mixing bowl. Stir in orange juice, orange peel, shortening and egg. Mix until well blended. Stir in cranberries and nuts. Spread evenly in loaf pan. Bake for 55 minutes or until a toothpick inserted in the center comes out clean. Cool on a rack for 15 minutes. Remove from pan; cool completely. Wrap and store overnight. Makes 1 loaf.

Ultimate Party Meatballs
1 - 16 oz can Ocean Spray Jellied Cranberry Sauce
1 - 12 oz bottle Heinz Chili Sauce
1 - 2 pound bag frozen, pre-cooked, cocktail-size meatballs (Beef or Turkey)
Place meatballs in a Crock-Pot slow cooker. Combine sauces and pour over meatballs. Cover and cook 4 hours on HIGH. Makes 30 appetizer servings.

Tip: For additional spice, add 1 teaspoon of cumin and 1/4 teaspoon cayenne pepper.
Enjoy!!!

Slow Cooker Chicken and Dumplings

4 skinless, boneless chicken breast halves
2 tablespoons butter (can be saved and mixed with 2 TBSP. flour in last 60 min. to thicken the liquid)
2 (10.75 ounce) cans condensed cream of chicken soup
1 14 oz can of chicken broth
1 onion, finely diced OR Onion Powder
Celery, 2 stalks, whole or diced, if desired
2 (10 ounce) packages refrigerated biscuit dough, torn into pieces
Salt and Pepper, poultry seasoning or paprika, to taste
Vegetables can be added in last hour if you’d like, frozen or canned; drained

DIRECTIONS
Place the chicken, butter, soup, and onion in a slow cooker, and fill with enough water to cover. Cover, and cook for 5 to 6 hours on High. About 90 minutes before serving, place the torn biscuit dough in the slow cooker. Push down into liquid so the tops get cooked too. (OR, roll the biscuit dough out and cut into strips) Cook until the dough is no longer raw in the center.
SERVES: 4-5

This was a fun way to share quick recipes. Thanks, Ronda!

Monday, November 17, 2008

Unique, Edible Gifts in a Jar

Our next-door neighbors are great. They never complain, are quiet, friendly yet unobtrusive, pleasant to chat with, and are all around super people sharing fences.

At this time of year, it is always a challenge to figure out something to give friends and neighbors that will be both somewhat unique and useful as a Christmas token of friendship. So a handmade gift is usually the best I can come up with for sharing. Making it edible and disposable are also desirable attributes of a gift for "those who have everything".

This season, I am going to try several jars of layered food items (bean soups, pancake mixes, scone mixes, cake mixes, hot chocolate mixes, etc.) for gifting to family and neighbors. Here is a fantastic website to check out for just such an idea: Budget 101; it has lots of great ideas and thousands of recipes for hand made give-away dishes. And this site also gives tips on how to make the entire package look attractive and seasonally packaged.

Here are some of my gifting recipes gleaned from Budget 101:

from Christmas Coffee Mix in a Jar:

1/2 cup powdered non dairy creamer
1 cup mini chocolate chips
2 Tbsp vanilla powder
1/4 cup sifted powdered sugar
2 cups nonfat dry milk powder
2/3 cup instant coffee crystals

Combine all ingredients and seal in ziploc or vacuum seal bag (or jar).

GIFT TAG DIRECTIONS: Add 3 T of mix to mug of hot water, stir & enjoy. May serve with chocolate dipped spoons.

and from Italian Herb and Rosotto Rice Recipe, this package looks excellent, easy and should prove colorful in the jar:

3-1/2 C. arborio rice
3/4 C. snipped dried tomatoes
8 chicken bouillon cubes
3 T.instant minced onion
2 t. dried oregano
1 t. instant minced garlic
1 t. dried rosemary
1 t. dried basil leaves, crushed
1/2 t. pepper

Makes 4 half pint jars.

Equally divide the ingredients and layer into 4 jars (evenly). Gift Tag : Boil 3 cups of water, add 1 jar of mix, cover, reduce heat and simmer for 20 minutes on low. Add 1/2 c. Romano or Parmesan cheese, stir well and enjoy.

Here is a picture of a peanut butter cup cookie recipe in a jar filled with the dry ingredients (enough for two dozen cookies):

Recipe from Peanut Butter Cup Cookies:

Reese's Peanut Butter Cup Cookie Mix in a Jar

3/4 cup sugar
1/4 cup packed brown sugar
1 3/4 cups flour
1 tsp. baking powder
1/2 tsp. baking soda
8 large Reese's peanut butter cups candies cut in quarters & Placed on top.

Combine all ingredients in Jar (in Layers) or vacuum seal bag.

Recipe to attach to jar:

1 Jar of Mix (take out candies; Set aside)
3/4 cup softened butter
1 egg, slightly beaten
1 tsp. vanilla

Combine all, except candy, in good size bowl; mix well. Once mixed, add Reese's cups and mix them in gently, or press them into each spoonful on the cookie sheets. Drop by big spoonfuls on greased baking sheets; Bake in 350 F oven for 12-14minutes.

These jars are fun to make, fun to give, and hopefully, will be easy to assemble for the giftees, and delicious when served.

Monday, November 10, 2008

Pulled Pork Barbeque with Liquid Smoke (the whole bottle)

Wow! Did we have a taste treat yesterday courtesy of a recipe I heard about in a podcast last week from The Splendid Table. It was Bar-B-Que Pork made with an entire bottle of Liquid Smoke.

In all my cooking life, I have only used liquid smoke by the dropful because of the power packed into it. So when I heard about using the entire 4 oz. bottle, I was dubious of the results. But the pork was fantastic and tasted like real Southern Barbeque.

It took a total of about ten minutes to put together, and cooked about eight hours in the crock pot. (And YES, use every bit of the contents of the rub recipe on the pork, although it seems like a large amount of spices. The original recipe calls for using 1/4 cup of the basic rub, but I used the entire 2/3 cup and was pleased with the results.)

Here is the recipe found at this website: Recipes

Ultimate Cheater Pulled Pork
Reprinted from Cheater BBQ: Barbecue
Anytime, Anywhere, In Any Weather by Mindy Merrell and R. B. Quinn (Broadway
Books, A Division of Random House, Inc., 2008) Copyright 2008 by Mindy Merrell
and R. B. Quinn.

Okay, here we go. Either we have you hooked at "Ultimate Cheater Pulled Pork" or this book is headed straight for the library's used book sale. We know that. You know that. So, let's drop the chitchat and make some cheater barbecue.

In short, you drop a pork butt into the slow cooker, add dry rub and bottled smoke, close the cover, go away for a while, pull or chop the meat and pile it on a bun, add sauce, get out the pickles, open a beer. BOOM! That's barbecue, baby. Can you feel it? That's Ultimate Cheater Pulled Pork.

Makes 12 to 14 servings

One 5- to 6-pound boneless Boston butt pork roast or same weight of boneless country-style pork ribs
1/4 cup Cheater Basic Dry Rub (recipe follows)
1/2 cup bottled smoke
Barbecue sauce of your choice

1. Cut the pork butt into medium (2- to 3-inch) chunks (the ribs don't need to be cut up).

2. Put the pieces in a large slow cooker (at least 5 quarts). Sprinkle the meat with the rub, turning the pieces to coat evenly. Add the bottled smoke.

3. Cover and cook on high for 5 to 6 hours or on low for 10 to 12 hours, until the meat is pull-apart tender and reaches an internal temperature of 190 F.

4. Using tongs and a slotted spoon, transfer the meat to a rimmed platter or baking sheet. Let rest until cool enough to handle. Pull the meat into strands. It should shred very easily. Serve the barbecue piled on buns with your favorite barbecue sauce.

5. To serve the barbecue later, cover and refrigerate the meat when it has cooled. Pour the meat juice into a separate container and refrigerate. Before reheating the juice, skim and discard the congealed fat layer on the top.

6. To reheat the barbecue, place it in a saucepan moistened with some of the reserved juice. Gently heat the meat on medium-low, stirring occasionally. Or, place it in a covered casserole with some of the reserved juice and heat in a 350 F oven for 20 to 30 minutes.

7. While the meat warms, combine the barbecue sauce and some of the additional reserved meat juice in a saucepan. Heat through and serve with the barbecue.

Cheater Basic Dry Rub (Makes about 2/3 cup)

1/4 cup paprika
2 tablespoons kosher salt
2 tablespoons coarsely ground black pepper
1 tablespoon garlic powder
1 tablespoon dry mustard

Combine all the ingredients in a jar with a tight-fitting lid. Shake to blend.

I was so hungry after smelling that aroma of meat cooking in the kitchen all day, I forgot to get out the camera and take a photo of it. Instead, we delved into the pork and a couple of side dishes of cole slaw and garlic bread, and the camera was left aside for the mouth watering event.

Oh, and our choice of purchased bottled Barbeque Sauce on the side was "KC Masterpiece Sweet & Tangy".

Monday, September 29, 2008

Peach Cobbler: Rolled Dumplings the Best!

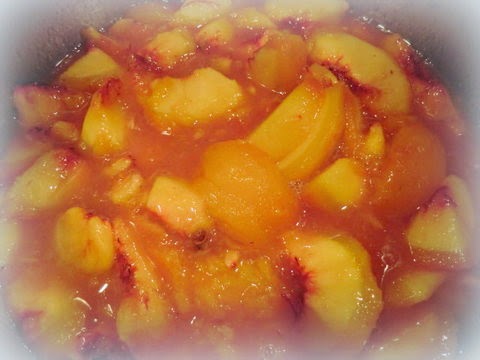
Ripe, lucious peaches are EVERYwhere in western Colorado this time of year. Sweet, juicy fruit picked straight from the tree of a friend was used to make our latest peach cobbler. Freshly grated nutmeg and cardamom make juices zing.


This season, I tried three recipes for peach cobbler and peach crisp. And the best recipe can be found at Cook.Com, in my humble opinion. Here it is:
OLD FASHIONED PEACH COBBLER
8 or 9 peaches, peeled and sliced
1/2 c. water
1 1/2 c. sugar2 tbsp. self-rising flour
Pinch of salt
1/2 c. butter, melted

Cook peaches in water until tender. Mix flour, salt and sugar. Add to peaches. Mix. Add melted butter.

PASTRY FOR COBBLER:1 c. self-rising flour
1/2 tsp. salt
1/3 c. shortening
4 tbsp. sweet milk, or enough to make a stiff dough

Blend flour, salt, and shortening to coarse meal texture. Add milk. Roll on floured surface. Pour half of peaches in 9x13 inch pan. Cut some dumplings and push dumplings down into the peach juice. Pour remaining peaches in and top with lattice strips. Bake in a 350 degree oven 35 to 40 minutes, or until top is golden brown. I like to sprinkle a little sugar on top before baking. This should be juicy cobbler, not dry.
This was my favorite because I prefer the rolled texture of the dumpling, and the fact that the self-created thickened sauce is similar to that of an apple dumpling.

A little vanilla ice cream doesn't hurt the taste!

Tuesday, August 26, 2008

Colonial Foods and Carrot Puffs as Appetizer

Our daughter gave my husband a cookbook several years ago with recipes dating back to the 1700's. It was fascinating to read about how much work was involved in simply keeping calories available for life sustenance. Reading over the recipes, it was obvious that cooking was not only labor intensive, but also a challenge when refrigeration and preservation of foods was practically non-existent. That book is not in the kitchen, garage, or in any box of stored books, so it must have gone by the wayside. Maybe someone else is using it now and enjoying it as much as we did.

Another handy cookbook entitled The Williamsburg Cookbook (1975 published by The Colonial Williamsburg Foundation and available through Amazon) says:

Visitors return again and again for the delicious dishes served at Colonial Williamsburg’s famed taverns and restaurants—Chowning’s Tavern Brunswick Stew, Christiana Campbell’s Spoon Bread, Shields Tavern Syllabubs. In this best-selling cookbook, 193 traditional and contemporary recipes have been compiled and adapted for the home kitchen. Commentary discusses the cooking and eating habits of our colonial ancestors and describes meals served to VIP visitors to Virginia’s restored colonial capital.

All sorts of recipes can be found in this cookbook stemming from colonial times. I picked up this book on a visit in the autumn season years ago in this historic Virginia town after having dinner at the Shield's Tavern in Williamsburg.

A beautiful slide show of Colonial Williamsburg, VA can be accessed here: Historical Slide show of Williamsburg in the Fall. That will get you into the mood for fall cooking, for sure.

One recipe from this updated treasury of recipes is for The Shield's Tavern Sampler Carrot Puffs (4-6 servings):

1 lb. carrots, peeled and sliced
1 egg and 2 egg yolks
1 cup bread crumbs
1 tsp. nutmeg, freshly grated
1 tsp orange flower water
3 Tbls. sugar
1/4 cup dry sherry
1/4 cup heavy cream

Cook the carrots until very soft. Drain well. Mash to a pulp. Combine and beat the egg and egg yolks. Mix the carrots, eggs and remaining ingredients together thoroughly.

Gently drop by heaping tablespoons into deep, hot shortening and fry until brown. Place on paper towels to drain. Serve immediately.

We have made carrot puffs from these instructions as an appetizer. These tidbits were sweet an tasty. I will make them again soon, but will try frying them in just a skiff of olive oil as a nod to better nutrition.

Cookbooks are always bestsellers. And historical cookbooks are a fun read, as well.

You might want to publish your own favorite recipes. Who knows, in 300 years, they might be republished. Here is one source that will help you put your cookbook together as either a fundraiser or just for posterity: Publish Your Own Cookbook.

Thursday, August 21, 2008

Food, Glorious Food

A couple of my husband's blogging buddies from Grand Junction, CO were dinner guests last evening. They are John Linko and Mike Saccone. Each friend daily writes a thoughtful piece on our community and its place in the world at their respective websites.

We had a delicious supper mainly prepared by DH Gene Kinsey, often wrong but seldom uncertain. Gene cooked a beef brisket that slowly baked in the oven all afternoon.

We also served a version of Emeril LaGasse's Mexican-Cole-Slaw. (Gene and I had lunch at a local Mexican food restaurant recently and both remarked on the delicious Cabbage Salsa. Our waitress gave us the main ingredients, and a Google search for this salsa/cole slaw was on.)

Gene added LOTS of fresh cilantro (maybe a cup) to the basic recipe, and boiled rice vinegar and sugar for a smooth dressing, with additional cumin, onion and diced jalepenos.


Gene also made tasty spuds in the form of Twice Baked Potatoes and garden chives.

My paltry offering to the dinner fare was the dessert, Creeping Crust Peach Cobbler, with a little added brown sugar, cinnamon and nutmeg on top. Peaches are plentiful in our happy valley this time of year, so the time was right to use up some local fruit produce.


Let's do that again!

Monday, August 11, 2008

Banana Split Cake and Sheep Cake for Birthday

I'm a big fan of Paula Deen's Home Cooking Show, and saw her make a delicious looking cake on her tv show last week. I thought that this would be just the dessert to serve family and friends on Granny's 80th Birthday.

So yesterday, I made Paula Deen's Banana Split Cake, and it was a hit at the end of our bar-b-que meal outside. It was very tasty, cool for summer, and an easy recipe that will feed up to 20 guests.

Since Betty (Granny) reached eight decades in age, and is a collector of "anything sheep," I decided to also make her a sheep birthday cake. Err, I mean a birthday cake in the shape of a sheep.

I looked at various places on the internet searching for how to make a cake in the form of about any object you can imagine. In this web hunt, I came across a cool video for making a DOG CAKE . Click here if you want to see a spectacular dog cake made over four days, compressed into a four minute video:


This sheep cake was shown at Family Fun with Recipe Finder:


It was cute, but who would eat all those marshmallows?

I came up with a different cake by using a boxed white cake mix, the required ingredients, and then baked the cake in a 9" x 15" jelly roll pan. After the cake cooled and was then frozen overnight, I cut out a sheep cardboard form and cut around the form placed atop the frozen cake. (It helped to freeze the cake thoroughly before cutting it.) The "waste" cake taken from around the edges of the sheep form was frozen for later use with strawberries in a different dessert.

After spreading the cut-out sheep cake with white icing, I sprinkled on colored sugar daisy petals purchased at the craft store. And I added two goofy eyes to the face of the sheep. With a little imagination, you can see the result looks a bit like a sheep:


This cake was a separate dessert for the birthday girl.

Granny's birthday present from Gene and me is this original watercolor by Maggie Ehmann. Matted and framed, it measures 23" x 25." I purchased this several months ago in anticipation of the Big Eight-O:


Maggie did a beautiful job with the sheep, shepherd and dog!

This is Betty blowing out candles on the cake at her birthday party yesterday.

Friday, August 1, 2008

Making Pesto to Freeze

As the gardener of six little struggling basil plants, I could hardly wait to harvest some of the herb to make pesto.

A few years ago, a friend had given me some frozen pesto sauce (delicious!) and I recall her saying to add cheese and butter to it after thawing and before using it.

That thought set me on a quest for a pesto recipe specifically for freezing purposes. This is where I found one: Pesto for Freezing (Food Network).

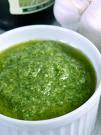
Using that recipe, but halving the ingredients because the basil is as precious as hen's teeth, and there was not two cups full yet available from the plants, here is a picture of the pesto in process.

And the bottom picture shows the miserly amount gleaned from those six basil plants, with added garlic, spices, olive oil and pine nuts.

So, basically, the only difference in preparing pesto sauce for consumption in the future by means of freezing is:

1: add just some of the olive oil to the blender, reserving the remainder for a "topping" in the freezer container (to retain a layer to help preserve it);
2: add the Italian cheese AFTER the pesto is thawed

Now we have about 3/4 of a cup of prepared pesto which will be enjoyable when the cold winds blow.

Hopefully, those basil plants will keep producing leaves, and there may be enough pesto by the end of the summer for several meals.

Wednesday, July 16, 2008

Lemons Several Ways: Recipes


Don't you just love lemons? Here is a little history about lemons:

Lemons are originally from northern India. The name means “golden apple”.

Lemon trees were grown as ornamental trees in Mediterranean gardens. Lemonade is believed to have been invented in Egypt over 1,500 years ago. Lemonade originally started as a lemon and honey wine, drank primarily by peasants.

About one fourth of the world's lemons are grown in the United States, mostly in California. A lemon tree may bear as many as 3,000 lemons annually. Most lemons ripen naturally in autumn and winter.

Basic Lemonade Recipe:
1 cup hot water
1 cup lemon juice
1 cup sugar

Pour hot water and sugar into small pitcher and stir to dissolve. Add lemon juice. Put the top on the pitcher and refrigerate.

To make a single serving, put 1/4 to 1/3 cup of syrup into a glass, then fill with water and ice. Easy and delicious!

Recipe #2: Snapple Lemon Flavored Ice Tea:
2 quarts water
3 tea bags
Boil water in large pan. When water comes to a raid boil, turn off the heat, put tea bags into water and cover. After tea has brewed an hour, pour sugar into a 2 qt. pitcher, and add the warm tea (so the sugar will dissolve easily). Add the lemon mixture (below).

Lemon Mixture:
¾ cup sugar (or a 16 oz. bottle of light corn syrup)
1/3 cup + 2 Tbsp. lemon juice

Now here is the kicker: Lemon as a Medicine from this site:
When Chinese doctors reveal their remedies, there is always something worthwhile to read. The clever cure of an infected finger or toe is dealt with in this way. The top of the lemon is cut off, the finger or toe is inserted into the lemon, and bound up. In the morning the infection is ready to be cleansed and well on the way to healing.
I've been drinking a ton of Crystal Lite lemonade; maybe I will try some of the old fashioned variety today.