Showing posts with label sewing. Show all posts

Sunday, January 2, 2011

Kaffe Fassett Collective Fabrics & Sewing Workshop Pattern

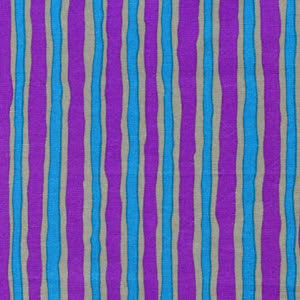
Here are samples of two Kaffe Fassett fabric purchases recently ordered from Sew, Mama, Sew, a favorite blog.


Each of these fabrics were ordered online because our one local fabric store in town does not carry this line.

Kaffe (pronounced "kay") Fassett is well known in the knitting world for his use of unusual color combinations.  He has expanded into books, yarn lines and fabrics from his London base.  He has a huge following in the fiber world.

This is the pattern I'll be using to make blouses with these fabrics:
It is the Tribeca pattern from The Sewing Workshop that Linda Lee owns. Each blouse requires 2.5 yd. of 45" fabric, plus notions.

More about Linda from her bio:
Linda Lee is the owner of The Sewing Workshop Pattern Collection, a group of patterns for distinctive garments using innovative sewing techniques. She is a licensed interior designer and member of ASID since 1974. Linda is featured in the Bernina "Portrait of the Artist" national advertising campaign.

Linda travels the country teaching fine sewing techniques and the art of combining beautiful fabrics and distinctive design in garment creation and home decorating creations.
Ms. Lee creates very loose clothing that is fashionable; and the clothes do not bind.  I became interested in her construction techniques because skin that is sensitive to touch requires looser clothing.  (If you are interested in reading about skin sensitivity, especially as it relates to clothing, this site is about the only one I found dealing with the topic, although there were no answers there about dealing with skin sensitivity.)

Have a look at all Linda Lees patterns.  It's something I really like.

Monday, June 28, 2010

Earbud err.. Earwire Covers & Ishbel Scarf

Let's not be petty with our little problems. But...

Do your earwires on your mobile listening device seem to tangle at the most inopertune times? Yes, my dear, I understand your pain.

Here is a very clever and quick remedy to your tangled listening problems: earwires in their own separate holders that keep them from getting on one another's turf.

Craftster gives an explanation of how to cover the wires shown in this picture of earbud wires covered with a sport zipper:


Don't you jthink that is a great solution to keep your wires straight? Yes, my pretties, you know it is.

Here is my rendition of earwires, using a red 18" sport zipper and sewn up within ten minutes:

Now you go and make some for yourself and show me yours. Mr. Piggy is just too classy with his new listening accessory, and his earwires are now tangle free.

Ravelry friends, the Ishbel scarf, in rendition number two, is completed.  All  knitting specs and intricacies are shown on this Ravelry page regarding the lace weight sparkly kid merino and silk yarn. 

Here is Dolly showing off the Ishbel scarf:
(That silk and baby merino yarn is softer than a baby's behind.)

Saturday, April 24, 2010

Angels Used in Embroidery

This site, Checkered Houses, displays artwork from over thirty artists.  Many are folk artists. 

Paul Flack drew the angel shown above. 

Paul began to look for that sense of fulfillment in painting, inspired by the likes of visionary artists. He had painted earlier in his life for a short time. As his spiritual quest grew, he became intrigued with the concept of angels. Angels are spiritual in nature, not religious and span time and appeal to all ages.
His angels are colorful, eye-catching, and unique in their forms. They appeal to everyone whether you believe in them or not and encourage the imagination to wonder in terms of what the painting means to each individual. It is in this, that Paul finds his fulfillment.
This will make an interesting outline for embroidery work on the back of a work shirt.  The lines are simple, and can easily be drawn from the photo onto paper or cloth for further embellishment.

Here is one similar angel embroidered from a kit, and sewn onto cloth, then appliqued on the backing of a woman's vest:


We need all the angels available to surround us, so why not on our clothing?

Thursday, November 5, 2009

Vintage Embroidery for Baby Pillowcase

Anticipating the birth of her first child, Marie at Knitted Gems is busy making darling things for soon-to-be born Elizabeth.  Knowing that Marie is a beautiful knitter, it would be like taking coals to Newcastle to give her a hand knit baby item.

Looking through my vintage pieces of needlework that good friend Dorothay sent me a while back from her mother's and sister's stashes dating from the early 1900's, here is what I found: a baby pillow case cover that was about 3/4 completed in embroidery.


The bunnies and flowers were so cute.  And the flowers gave it a whimsical feel.  But the back of the pillowcase was a grey cotton linen and definitely needed an update.

Here are the project finds that would help complete the "new" pillow after a bit of tweaking with embroidery floss, crayons, and a new piece of fabric backing:  Tracey at Giggleface Studios has an excellent tutorial on using crayons on fabric that can be accessed here. Using those techniques, more color was added to the picture.


Just a  fat quarter of fabric was required for the new backing for the pillowcase.  $1 would purchase a bit of batik color fabric that coordinated with the existing floss colors.

Knowing that Elizabeth has a great chance of inheriting her mother's beautiful strawberry blonde hair color, just a bit of mixed orange and pink embroidery floss was used on the fabric for the little girl's head to make it a personalized pillow for Baby Elly.  A new pillow, a bit of vintage tatting and lace, re-worked embroidery and a bit of sewing turned out this:


This was a fun project, and hopefully the pillow case will be something that Elizabeth will save for her own daughter in future years.

Monday, April 27, 2009

Tee Shirt Purse - Easy!

Previously, I blogged about making tee shirt purses and got lots of inquiries on "How to Sew a Tee Shirt Purse" from Google.

So, it must have meant people were looking for easy ways to make purses from retired cotton jersey shirts.

The references from the September 2008 posting about how to make the satchels were this website and the Craftbits website and the Curbly website.

Then I received a comment from a reader (Fenna), who said an even easier way to accomplish making a bag from a t-shirt was to:
1. Cut off the arms (she says to feel free to make a big arch for a more dramatic look)
2. Cut a large scoop out of the neck (this will vary depending on design of the t-shirt)
3. Turn it inside out and sew the bottom of the shirt together.

Fenna was right on!

Here was an old tee shirt from Hawaii that just begged to be used for a craft project, along with some scrap ribbon that was forlornly lurking in the knickknack bin in my crafts closet:


Following Fenna's directions, the sleeves were cut out and the neck was scooped down with scissors. The only sewing involved was turning the shirt inside-out and seaming the bottom closed. It was gussied up with ribbon around the raw edges overlaid with a buttonhole stitch, but that step was not really necessary.


The Maui t-shirt bag is now holding my hand made sock stretchers purchased from the Etsy Squire Country Craft Store, along with some yarn for the next sock project. These sock blockers are a very nice product for knitters, entirely made by Montana crafters.

Here is a picture of all the craft filled bags in my catch-all closet. They each hold a UFO (unfinished object) that I'll get around to finishing sometime (maybe).

Note that the black mice with their tails wrapped around the hangers stayed over from Halloween. Maybe they were sniffing around for an overlooked scrap of yarn or material to take back to their own sewing burrows.

Using an outgrown baby sized t-shirt with a whimsical motif on its front would make up into a darling little baby bag (bottle warmer?). You can think of many applications from this easy method of recycling t-shirts.

Tuesday, January 13, 2009

Mending with Vintage Fabrics; Mending Hearts

Susan Cooke Kittredge, senior minister at the Old Meeting House, Vermont (daughter of Alistair Cook, whose “LETTER FROM AMERICA” was the longest-running commentary series in history.) Excerpted from “We ALL NEED MENDING” on THIS I BELIEVE, aired on National Public Radio in February, 2008, I would like to copy her writing here because I believe it to be valuable.

After reading through Kittredge's thoughts, I am posting a picture of my favorite work shirt which has been mended over many times with old linens. Each vintage piece incorporates beautiful embroidery work done many years ago by women whom I will never having the privilege of knowing.

by Susan Kittredge, taken from National Public Radio:
Like most women of her generation, my grandmother, whom I called Nonie, was an excellent seamstress. Born in 1879 in Galveston, Texas, she made most of her own clothes. Widowed at 43 and forced to count every penny, she sewed her three daughters' clothes and some of their children's, as well. I can knit but I cannot sew new creations from tissue-paper patterns. Whenever I try, I break out in a sweat and tear the paper. It clearly requires more patience, more math, more exactitude than I seem willing or capable of giving.

Recently, though, I have come to relish the moments when I sit down and, somewhat clumsily, repair a torn shirt, hem a skirt, patch a pair of jeans, and I realize that I believe in mending. The solace and comfort I feel when I pick up my needle and thread clearly exceeds the mere rescue of a piece of clothing. It is a time to stop, a time to quit running around trying to make figurative ends meet; it is a chance to sew actual rips together. I can't stop the war in Iraq,

I can't reverse global warming, I can't solve the problems of my community or the world, but I can mend things at hand. I can darn a pair of socks. Accomplishing small tasks, in this case saving something that might otherwise have been thrown away, is satisfying and, perhaps, even inspiring.

Mending something is different from fixing it. Fixing it suggests that evidence of the problem will disappear. I see mending as a preservation of history and a proclamation of hope. When we mend broken relationships, we realize that we're better together than apart, and perhaps even stronger for the rip and the repair.

When Nonie was 78 and living alone in a small apartment in New Jersey, a man smashed the window of her bedroom where she lay sleeping and raped her. It was so horrific, as any rape is, that even in our pretty open, highly verbal family, no one mentioned it. I didn't learn about it for almost five years. What I did notice, though, was that Nonie stopped sewing new clothes. All she did was to mend anything she could get her hands on as though she could somehow soothe the wound, piece back together her broken heart, soul and body by making sure that nothing appeared unraveled or undone as she had been.

Mending doesn't say, "This never happened." It says instead, as I believe the Christian cross does, "Something or someone was surely broken here, but with God's grace it will rise to new life." So too my old pajamas, the fence around the garden, the friendship torn by misunderstanding, a country being ripped apart by economic and social inequity and a global divide of enormous proportions — they all need mending.

I'm starting with the pajamas.

Each time I mend, I think of Susan Cooke Kittredge and her thoughtful commentary.

This is my work shirt that is in a constant state of "mending", because each time the shirt is washed, some of the vintage embroidery work frays. Those torn pieces are covered over with newer pieces of linens, be it hankies, pieces of antique tablecloths or napkins or even old table runners.

Just like the repairing of this shirt, I believe we are in a continual state of mending over wounds, be it in the loss of expectations or ways in which we have disappointed others and ourselves.

It is something to think about.

Thursday, January 1, 2009

How to Make Japanese Knotted Bags (borrowed instructions)

A few months ago, I was looking for a quick purse to make from fabric and came across an excellent tutorial created by Helen in New Zealand. Her complete instructions, including nice photos of her Japanese print bags, can be found at Japanese-knot-bag.

Only two fat quarters (if you are not a quilter, one fat quarter equates to very little fabric) are required to make this bag (photo courtesy of Helen):

She says about her shop where she sells hand crafted items:
Welcome to Show Your Workings. I like to recycle and re-purpose. I mostly work with fabric but also collect and sell vintage patterns and haberdashery. I'm trying to live a sustainable life in New Zealand with a small footprint, craft is a way of living sustainably and inventively (that's my excuse anyway!). I also write and blog at http://showyourworkings.wordpress.com/
Thanks for stopping by and supporting NZ handmade.
Her online shop can be accessed at Helen's Etsy Shop.

The process for sewing the purse looked so intriguing that I just had to try it. I am not finished with my Japanese knotted bags, but here is a photo of three sets of coordinating fabrics that will be used to make three different bags:

A couple of coordinating face pins in my jewelry stash will be added to the sides of the purses when the sewing step is completed.

One idea that I added to Helen's instructions for making the Japanese-knot-bag is this: use the plastic that comes atop any 2 lb. coffee can as the insert for the bottom of the bag. You will not even have to cut the plastic, because it is exactly the same size as the pattern piece. And you will be recycling plastic and going green.

If you are looking for another type bag to sew, you can go to another quick tutorial on making shopping bags at Free Crafts:Shopping-bag.

The entire cost of making one Japanese knotted bag was less than $5, including newly purchased fabric. They are the perfect size for holding a small knitting project, or just your car keys and a lipstick.

If you make one of these bags, please send me a picture of it, and I will post it on a future blog. Thanks!

Wednesday, November 19, 2008

Prayer Shawl Pattern for Wheelchair Users and Those in Bed

In a previous post, prayer shawls were discussed. I was searching for a way to make a shawl from quilting or fleece fabric because it would be much quicker to construct by sewing, using purchased fabric.

While browsing the internet, I came across more than 200 sites about prayer shawls, but not one reference could be found on how to make a shawl using fleece or flannel material. So if you are looking for something not requiring the time and expertise commitment of using yarn in a knit or crochet technique, this pattern idea might work for you. It is especially useful for wheelchair users or for those who stay in bed most of the time.

Here is some background on prayer shawls before I get on to the quick pattern I devised below:
The Prayer Shawl Ministry was started by Janet Bristow and Victoria Galo in 1998. Susan Izard and Susan Jorgensen wrote Knitting Into The Mystery which is an excellent introduction into the rituals of prayer shawl knitting. A very good introduction into the process and a good reference for starting prayer shawl ministries. But, there was really only one pattern so it was a bit limited in terms of yarns that would look good with that pattern.
This reference to the Prayer Shawl Ministry was found at Kelly Petkun's site. Kelly has a weekly podcast that her dog Xena helps produce complete with voice-overs.... I mean bark-overs in the background. You can listen to the Knit Picks podcast here at KnitPicksPodcast.

Kelly talks about knitting, products, and interviews guests discussing recent knitting designs and life, in general. Kelly and her company are virtual friends by way of download! And every bit of yarn that I have purchased from the Knit Picks website has been of good quality and arrived quickly.
The above picture is a shawl used as a prototype for the pattern I cut out this morning. The original outside dimensions are 63" (length) by 50" (width).
To make this shawl for someone who stays in bed, the fabric was cut down in the back so that the shawl will drape across the shoulders and warm the front of the body. Cutting out extra fabric from the back makes it easier to maneuver in a wheelchair, and also decreases bulky fabric while using in bed.
Here are some easy directions and a picture of the work in progress:
PATTERN FOR PRAYER SHAWL (using fabric):
Fabric requirement: 2.25 yd EACH of two contrasting fabrics (fleece, flannel, old quilts, etc); or a total of 4.5 yd of 45" wide fabric from the same fabric bolt
Notions: thread

Directions:
1) Cut two pieces of fabric 39" long (includes 1/2 inch seam allowance). The total width will be 50", most of which will be used for the front of the shawl. You will need to piece these two cuts of fabric together, making a seam down the center back, ensuring the width of the cut pieces, when sewn together, is about 50" wide. Press pieced seams flat.
2) Cut a "U shaped" window from the fabric from the bottom up, leaving about 8" at the top for neck and shoulder placement (the "U shaped" cut out should be about 8 " wide and 29" deep and will be placed behind the neck).
Repeat the above steps for the second fabric side.
3) With right sides facing each other, sew the two fabric pieces together, leaving about a six inches opening for turning the shawl right sides out. Press seams flat.
4) Hand sew the opening together using a slip stitch.

Here is a picture of a finished flannel shawl using the same fabric on the back as on the front. It looks warm, will be easy to use in bed, is washable, and will be more comfortable because some of the bulky fabric has been eliminated in the back. This is for daughter Julie while in the hospital, at the nursing home, or in her wheelchair.
Good luck in making some of these for people you know who might need a little comfort, with a prayer sewn into them.
Leave me a comment if you have questions.

Friday, November 7, 2008

Vintage Patterns & Prayer Shawls Made From Quilts

One of my favorite weekly emails is from Debbie Colgrove, a sewing whiz with a company which someday might rival Martha Stewart, if given the right opportunities.

Here is what Colgrove said today:
I have a gazillion patterns.... so many that it's usually easier to glance through pattern books and buy a new one than it is to try and find the pattern I want...
And who hasn't wanted to go back in time and retrieve that classic pattern used years ago?

There was one particular dress pattern my SIL Charlotte and I used until the pattern was worn thin: that of a long jumper dress.


So I went on a search through vintage patterns on the internet. There are many listed websites for vintage patterns, but the site where I purchased this pattern from was Old Patterns. This is the pattern I purchased:

My favorite is the jumper displayed in the middle of the photograph (it uses 4.5 yd. of 45" fabric).

Reading emails and others' blogs is dangerous to my personal economy, but I did pick up another thread of conversation from the Colgrove email that was a link to a book titled Prayer Shawl Quilts.

This book piqued my interest, so I went to my blog sidebar (see the little picture of the book with AMAZON printed on top of the box) and ordered the book. It should be here by next week.
Making prayer shawls through the knitting and crocheting method is a lovely sentiment; the time requirement is intensive. My daughter Julie (in a nursing home and due for another surgery on Nov. 18) is always cold, so using quilts, blankets, fleece and other warm materials to make washable shawls for her will be my answer to keeping her cozy while in bed.

And I can sew prayers for her comfort into the shawls, as well. Look for a report on the book Prayer Shawl Quilts from me soon.

Thursday, October 30, 2008

Quick Halloween Costumes for Dogs

Want a fast, easy way to dress up that pup of yours? How about a simple scarf cut from a 1/4 yd. of Halloween or (insert appropriate holiday time here) seasonal fabric? Cut a triangle on the diagonal of the grain of fabric, put the fabric piece around the dog's neck and tie under his chin.

Or, go a bit fancier and make a double sided scarf with two coordinated fabrics, sewn together right sides facing one another, leaving a few inches gap for turning the fabric right side out. Attach a button or velcro for closing the scarf, and your furry dog friend will not be bothered by a heavily knotted piece of fabric under his chin.

A paper pattern is shown here and looks like a modified bell curve, with the length of the pattern at the longest end being about 20 inches for a small (10 lb.) dog.

Therapy International Dog Libby Sweetpea is shown sporting her Halloween scarf. This tie was made by cutting out two coordinating fabrics in the shape shown above, sewn together, turned, and a buttonhole and button added on each side of the rounded triangular shaped scarf.


Another idea for making dog clothes from the ever popular onesies for babies can be seen here at DIY Quick & Easy Dog Clothes. If you click on the link, a darling tiny Chihuahua will be shown sporting a pink onesie easily made with directions given at the same site.

My DH does not like animals in sporting outfits, and will not walk either of our pups with their pink leads, but once in a while he goes along with a themed scarf around their necks. What compromises we make for family harmony!

Friday, September 26, 2008

How to Make a Fabric Broach (Christmas Flower)

Molly at Mollychicken gave an easy, fun tutorial on making fabric broaches. That tutorial is complete and easy to read, with great pictures. It gave me an idea for making a broach that I could wear with black and red colors.

Naturally, Christmas comes to mind with the reds and greens traditionally used for the season. I had lots of scrap fabric on hand, so the only fabric I purchased was 1/4 yd. of tartan plaid flannel. Total cost of the project was under $2.00, including the plaid fabric.

Molly says to use hessian backcloth for the broach. Not having any hessian fabric on hand, I resurrected an old piece of needlepoint backing for the broach base. It worked just fine.

I did not pull through the fabric strips, but instead, sewed them onto the pencilled-in concentric circles. Instead of using felt to cover up the stitching on the back, I recycled a plaid collar from a vest previously scavengered for fabric and trimmings. A circle of the plaid fabric was cut out to fit the back, then a clasp was sewn onto the circle, and the completed back was hot glued onto the backing. A more finished plaid backing was the result.
The other finishing step was cutting the ends of the fabric strips at a slant. This was done haphazardly with scissors, but pinking shears could also be used to make the ends look prettily frayed.

I also researched this site for information about making rugs with rag strips. It was a good read and gave me some more ideas about out how to make the Christmas flower broach.

Here is a picture of the back and the front of the broach, using red, green and coordinating colors in the fabric scraps:


The project was an hour well spent, and a different type of craft using old methods incorporating rug making and recycling.

Wednesday, September 17, 2008

Beading on Fabric

If you like to work with beads, eventually you may want to try sewing beads onto fabric.

Several years ago, I made a lined jacket and wanted to embellish the lapel with beads. I tried various methods, and ended up sewing the beads onto the jacket with nylon fishing line. If I were to do this over again, regular cotton floss would work just as well.

I decided to put an iguana likeness onto the lapel. It was just a basic tracing from a picture of an iguana, and the beads were sewn on in a more or less random fashion.

Here is a picture of the close up of the beaded iguana, and then the entire jacket:

The edging of the jacket also has attached beads.

For a tutorial on stitches, here is a good website I found: Coats and Clark

Basic Beading requires only a needle, thread and beads. There are just two stitches to learn—a stop stitch and a running stitch. Other stitches are variations of these.Basic Beading requires only a needle, thread and beads. There are just two stitches two basics.

Running Stitch: This is a stitch with a bead in it. Cut a length of thread no longer than 15”. Knot one end of the thread. Bring needle up through the fabric to the right side and thread a bead onto the needle. Bring the needle back through the fabric to the wrong side right next to the bead. Continue sewing beads using this running stitch. On straight lines, depending on the size of the bead, several beads can be threaded on the needle and sewn on in a single stitch. Every 3 or 4 beads, take a back stitch to secure.

Stop Stitch: This is for attaching two beads-usually a large and a small bead. Bring needle up through the fabric to the right side and thread first the larger then the smaller bead onto the needle. The small bead is the “stop”. Bring the needle back through the first larger bead to the wrong side of the fabric.Fence Stitch Bring needle up through the fabric to the right side and thread a bugle bead, a seed beadand another bugle bead onto the needle. Take a short stitch so that the bugle beads stand up creating a “fence”.

Loop Stitch: Create a dramatic edging with this stitch. Bring needle up through the fabric to the right side and thread several (8 to 10 depending on the size). Use the last 6 or 7 beads as the “stop”. Bring the needle down through the first couple of beads and to the wrong side of the fabric.

Vermicelli Stitch: This is the basic running stitch, but each stitch is taken in a different direction. It can be a pattern such as a zig zag or completely random.

This winter, I want to try more bead embellishment on vintage blouses and shirts. And THIS time I'll follow the directions.

Friday, September 12, 2008

Sewing T Shirt Purses

From 10 Easy Steps to a T Shirt Purse, you can read about how to make a purse from a T shirt. However, it seemed pretty complicated to me, so I kept searching the internet for an easier way to make this little catch-all.

Here is another site with easier directions for making a T shirt purse: Craftbits.

Finally, my favorite, and the EASIEST way I found to make a T shirt Bag was found at this site. Go to How-to-Make-a-Sporty-Grocery-Bag for the directions.

I swear it only took me ten minutes to make this one. An old blue Hawaiian keepsake T shirt, overwashed and overshunk, was crying to be used for this project.

With a few modifications and a black ribbon sewn on for handles, here is my NEW t shirt purse which holds a sweater knitting project:


If you want to PURCHASE a T Shirt Purse, over 420 ETSY SHOP OWNERS ("everything hand made") will sell you a refurbished and/or new T Shirt Purse for prices ranging from $8 to $35 each.

Friday, August 15, 2008

Emmeline Apron by Meg McElwee

Back in July, I wrote about designer McElwee and The Sew Liberated-Apron. Since it is Friday and a day for finishing up projects, thought I would show how the apron and pocket project turned out. So here is a picture (too bad there is no cute young girl around to model it).


It is reversible, and each side has this a pocket made from a vintage apron, transfers, and embroidery.

A few of the steps on the embroidering of the flapper girl pocket are shown in the photo below and previously written up here.

Coloring with crayons on fabrice is a neat and easy concept. The idea was blatantly copied from giggleface studios for all steps of the Flapper Girl face.


The apron has a flattering fit over both the bodice and hips, and I'm wearing it today over crop pants.

Thursday, July 24, 2008

Making Fabric Roses

If your sewing stash looks like mine, you will have plenty of extra selvage fabric to make these roses, since each rose requires only one piece of fabric 5” x 30” (piece it together if you don’t have a 30” strip; no one will ever know!).

Joann Fabrics gives a quick tutorial and says
If you are a fan of fabric, this is the project for you. Fabric flowers give allergy sufferers nothing to sneeze at when adding a decorative element to any room. (Picture courtesy of JoAnn Fabrics)
The instructions are downloadable (only one page).
One of these flowers (or two) would make a lovely “bow” on your next gift package.

Tuesday, July 22, 2008

Making Neck Pillows, Oh, My!

As usual, the world wide web is a wealth of information about making neck pillows: decorative, scented, or medicinal, it is all there.

Here are some sites worth reviewing if you want to make one yourself:

Kids-sewing gives a simple diagram of how to draw a kids’ pillow, using fleece material. It could be stuffed with polyester fiberfill or just plain uncooked rice. Then pop it in either the freezer or the microwave to comfort a child.

A pattern for a neck pillow in the shape of a dog bone can be found here at dogbone pattern.

But why limit this pillow to children? An adult pillow can be made easily, and the DIY website provides the easiest way I found to make a neck pillow.

And with step by step directions given by Sew Mamma, this tutorial for a Rice Heat Therapy Bag with Washable Cover looks simple enough.

Comfy Country Creations says this about Scented Neck Pillows:

Heated, scented neck pillows can give relief to sore, aching muscles while soothing the soul. Drape it around your neck, lay it across your back, or slip it between the sheets to warm the bed before retiring for the night. They are easily made and can be filled with grains or add some herbs and spices for a tranquil aroma.
A scented pillow sounds great! So I found this site which gave a recipe for scented rice:

In a glass Mason-type jar pour a teaspoon or slightly more of potpourri-type fragrance or essential oil, swirling the jar around to coat the insides. Add nearly a pound of uncooked, small grain rice. Place a coffee filter over the top and screw the lid on tightly. Shake well to coat the rice and place the jar on its side. Over the next few days, roll the jar frequently until the rice has taken up the scent of the oil. Cinnamon, apple, cloves, lemongrass, lavender, lilac, orange blossom, honeysuckle, rose, sandalwood, bergamot – the scent choice is yours.
If you budget allows, and you are not a crafter, perhaps you would like a Luxury Travel Pillow

...since those small pillows now provided by only some airlines aren't very comfortable. Inflatable travel pillows are available for less than $20, while slightly more cumbersome stuffed travel pillows are available from several manufacturers. Brookstone, for example, offers the Nap Travel U-Pillow ($25), which is stuffed with thousands of micro beads.

For $75, a u-shaped neck pillow from Tempur-Pedic is made from memory foam that cradles and molds around the user's neck and conducts body heat.

Either way you go, purchasing a new one from your supplier of choice, or making it yourself, neck pillows are always winners, especially if they smell oh, so nice!

Monday, July 21, 2008

Aprons - Making and Collecting Aprons

Aprons, especially vintage ones, have been on my radar for a few months. Not only are they making a comeback in style, but they are also making big impressions on bloggers. In a brief Google blog search, I found more than a dozen women who blog JUST ABOUT APRONS.

A brief history of the apron is given in Alana's blog:

The word “apron” actually originated from the word “naperon” which is a French word for a napkin or small tablecloth. And, some of you may be surprised to find that the apron did not start off as a piece of apparel worn singularly by women. Instead, aprons were mainly worn by men when they were first invented. ... men wore the apron while completing work in such professions as: blacksmiths, farmers and gardeners, fishmongers, meat and wood carvers, furniture makers, leather smiths, cobblers, tailors, jewelers, metal forgers, clock makers, barbers, and stonemasons to name just a few.

A few weeks ago, another post can be read here about Meg McElwee's figure flattering Sew Liberated Emmeline Apron. That project is almost completed, and I'm having fun putting the clever bodice together (it features three coordinating fabrics).

For your reading pleasure, here are a few fun blogs about aprons. They all have excellent graphics:
HER TIMES and Betty Ninja and Apron A Day and Flapper Girl Creations and Craft Chi and Lulus Vintage and Fuse Action and Rick Rack Attack and Tie One On and The Apronista (she is sponsoring two apron swaps for your participation) and Textiles and Quilts, which is especially for tips about collecting vintage aprons
For a quick pattern to make your own apron from one yard of fabric, visit: One Yard Apron.

Whew! On the right is a picture of a darling apron I purchased yesterday at the Farmers' Market in Palisade, Colorado.

It is similar to a wrap-around dress that goes over your head, made by Shelle Kareus and sold by her and her husband's business, the Uintah Trading Company.

Shelle and her husband are shown above with some of her aprons.

Don't you love it that Roy is a furniture maker and is wearing a catchy turquoise and red apron?

Leave me a comment and I will give you a contact telephone number if you would like to purchase one of Shelle's several types of delightful, hand sewn aprons.

Thursday, July 10, 2008

Sewing a Woman's Shirt from a Man's Shirt

That good old Pfaff sewing machine has been working with vintage tablecloths and napkins to help me create a woman's work shirt that takes on some feminine aspects. There was a work shirt application about painted and appliqued men's shirts previously posted, and this is another way to work with men's shirts.

A blue plaid size L man's shirt was newly purchased at a discount store. The white and blue pieces of fabric with embroidered flowers were cut from a vintage tablecloth and added to the plaid to perk up its appearance.


The shirt cuffs have an extended triangular piece of cut work taken from a vintage tablecloth (mirror images on left and right cuff). That fabric was then appliqued over the sleeves and down to the cuff from a 5" length triangular swatch.
When folded upwards, the cuffs show the pretty cut work.

Likewise, the back and front yokes of the shirt were similarly appliqued. Above is the back neck and below is the front of the woMAN's shirt:

I like to wear long sleeved shirts year-round to hide a bit of my compression bandage, and finding cool summer fabrics in long sleeved shirts is a bit of a challenge, except when shopping in the men's section of department stores.

Purchasing a man's 100% cotton shirt and then feminizing it with sewing techniques makes it somewhat more of woman's apparel and solves the problem of looking for shirts with long sleeves that are less available in women's clothing. Wear it over a t-shirt and it creates a sort of easy-wear jacket that hides a multitudes of figure problems.

Tuesday, July 8, 2008

Keeping Busy

For a thoughtful read, see Abbi's Blog. Abbi in Minnesota writes there, and she inspired me today.

It got me to thinking about the scripture translated from Proverbs 31 which says

Make it your ambition to lead a quiet life, to mind your own business and to work with your hands

These women are working their toils ...


And maybe that is why, in part, I like crafting and artsy tutorials (because it keeps my mind and hands busy).
I laughed when I looked over at the ironing board and saw this early today:
... my projects piled up that help remind me to mind my own business, live a quiet life, and work with my hands.

And what is on YOUR working board today?