Showing posts with label Art. Show all posts

Thursday, June 30, 2011

Vintage Seed Packet Images

Vintage seed packet pictures: an internet search came up with many good links.  The beauty of Victorian ephemera is quite fetching, especially since all images were hand drawn and painted.

Links to free images of vintage seed packets are cataloged here for my (and your) future use, along with some of the pictures that captured my eye.  These images will be an excellent source for referencing, painting, and posting on my Floral Art blog.

Here are some links, in no particular order:

Smithsonian Museum: "Seed Packets, Vintage"

(sweet peas)
(pansies)
and my favorite:
Free Vintage Fruit Crate Labels:


Go to Google Images and you will see many such as this one:
Bing Search Engine has lots:
Vintage Seed Packet Templates shows many templates with flower and vegetable images, all free to use for your own non-commercial purposes.  (They are in PDF format)

Home and Garden has more images:

And some blog posts about vintage seed packet images and how they might be used can be found at The Frugal Mennonite, The Vintage Workshop, Blue Hour Studio, to name just a few.

So there you have a short run-down of sources for your viewing pleasure.

Sunday, June 26, 2011

Referencing a Multi Talented Woman Blogger

For art lovers and those who enjoy beautiful images, please wander on over to It's About Time.  This site will provide pictures and bio information about a variety of topics, including:
  • flowers and gardens
  • reading
  • motherhood
  • outside art
  • boating
  • the countryside
  • folk art
  • working with textiles
  • Madonna and child
  • and NINE other topics for you to investigate for lovely illustrations
  • PLUS Four, yes four, other blogs Barbara authors, each in its own separate blog space, and each fascinating in its own right

Michael Peter Ancher (Danish artist, 1849–1927) Artist's wife Anna Ancher

This is just one of the pictures found on one of Barbara's blogs.  She entitled it Outside in the Hot, Hot Garden.

Can you tell I am very much impressed by this prolific blogger and researcher? In part, she says:
I am a historian, the images usually cluster around some social, cultural, or academic theme or a timeline. I try to choose works that justify their inclusion on aesthetic grounds. There is a little museum in each blog -- no travel necessary.
dawn chorus, Ipsden, Midsummer (mp3)

A blogging buddy who lives in the UK doing her PhD (The Domestic Soundscape) introduced me to Audioboo and provided the bird call. (It is one of Felix's top hits!)  Just click on the arrow and turn up your speakers and you will feel like you have a morning flower bouquet in your hand!

The picture of  the yellow flowers In Anna Ancher's arms reminded me to put this small work of sunflowers in oils that I have been painting for a few weeks:


The stems have not been started, and the centers have no definition yet.  We shall see.

Thursday, June 2, 2011

Leaf Little to the Imagination

From The Daily Mail, artist Ju Duoqi created these works from nothing but Chinese cabbage leaves:


...amazing

Sunday, May 15, 2011

Childhood Home in Watercolor

Just dusted off a watercolor I painted of my childhood home in Mereta, Texas.  We lived there during the drought in the mid 1950's.

Please visit my art blog that I updated with my better works (it's subjective, I know) on the sidebar.  HERE IS THE BLOGSITE.

And leave a comment if you are so inspired so that I know at least someone went to the Floral Art Blog.  Thanks!

Monday, May 2, 2011

Twig Art and Lime Buttermilk Chess Pie

SIL Jack sent me a link to twig art by Patrick Dougherty from North Carolina.  Jack took this picture of Dougherty's work displayed in Rock Hill, SC.   Cool picture, eh?
More Dougherty artwork:


From a linked link on the Deep Fried Kudzu website (i.e, the sidebar had a link) the original recipe for Lime Buttermilk Chess Pie was given, and since I am a big fan of chess pie, I just had to make it.  But I digress.  Here is the recipe from Ginger:
1 cup plus 2 tbsp sugar
1-1/2 tsp cornstarch
splash good vanilla
pinch of kosher salt
1-1/2 cups buttermilk
3 large eggs
4 tbsp unsalted butter, melted and cooled
2 tbsp lime juice (I think I actually used a little more. Taste the mixture and add more if you think it needs it, but be careful.)

Preheat the oven to 300 degrees.

Mix the sugar and cornstarch in a small bowl, add vanilla and salt. Set aside.

In a Kitchenaid, mix buttermilk on low speed until frothy. Add eggs, butter, lime juice. Add dry ingredients. Don't mix for a long time - just incorporate. (my note: the idea is to keep all of this nice and cool. Frank says to cover and put the mixture in the refrigerator for two hours, but again, it was late in the evening.) Pour the mixture when it's nice and smooth into the pie crust. Bake at 300 degrees F.

The cookbook says that this needs to cook for 20-25 minutes, until the filling is just set but still jiggly in the center. At 25 minutes, this filling was only beginning to set at the very edges. It took about an hour for it to cook properly (and again, you don't want it to be completely set in the middle
Here is how it looked after an hour of cooking time:

but with three modifications: 1) added the zest of one lime; 2) covered the edges of the pie crust with foil; 3) cooked it for 60 minutes. Note: this pie was cooked at high altitude, so it took longer to bake.

Ginger at Deep Fried Kudzu says to let it set overnight and it will firm up.

Tuesday, April 12, 2011

Sheep Picture by Craftlit Friend Amy & Watercolor

Fellow tourist to Wales in the UK took this picture.  Actually, this is a screen shot, and the original was much clearer.  Is that a magpie on that sheep in the background?


Here is my watercolor rendition of a sheep:


This sweet picture of a fairy is my next watercolor effort. My first attempt ended in the wastebasket because it had too much color in the background.

More Flower Fairies can be seen here.

Monday, April 4, 2011

Angry Birds...err...Petulant Birds?

Almost finished:


And with a little more attitude:


Oil, 11" x 14"

Now working on two large panels on wrapped canvas of similar petulant birds for home display.

Wednesday, March 30, 2011

Artwork by Charles H. McCarroll

Brother Mac worked in commercial art for his entire vocational career.  He got his artistic bent from our mother.

Mac is also a Viet Nam veteran, a Marine, a husband and father.  Here is his brief service synopsis, as he relays in this collage:


And here are a couple of his recent paintings displayed in his and his sweet wife's home in Texas:


 Acrylic: 24" x 47" (CH McCarroll)

Acrylic: 16" x 16" (CH McCarroll)

Thanks, Mac, for letting me show these two pictures. Now go paint some more!

Friday, March 11, 2011

Wrens With Attitude

I came across a cool blog post by Andrea where she was talking about birds, their teeth and their expressions.  She says, in part
...no real bird has choppers like cartoon birds. Here is a list of cartoon birds that at one time or another have had dental issues: Woody Woodpecker, Donald Duck, Woodstock, Daffy Duck and Iago. Some claim that the whole cartoon bird with teeth phenomenon started in an attempt to give a bird the character of a human.

Andrea then goes on to say that her images may portray the bird's expressions to be surprised, angry, happy, etc.

Cute expressions, eh?  I think she captured them pretty well.  She has a lot of cool artwork for sale in her etsy store that you can find at BadBirds Art and Embroidery Patterns.

Along that same line, here is a close up of some wrens I am working on in oils.  The canvas is 12" x 36", gallery wrapped.  I'll add some different bird expressions on the second canvas, using some of Andrea's tips.

Thursday, February 10, 2011

Take the 10 Minute Art Challenge

Ninety-one entries as of 2-9-11 came into The Daily PaintWorks Challenge found here.  This is a fun experiential art challenge.  More information from the same site says:
The rules: Get a timer. Divide your canvas or canvases (I used 2 - 6x6in Raymar canvases) into 8 or so small squares (or rectangles). They should be smallish – a couple or 3 inches square or thereabouts – they don’t have to be perfect. Now choose ONE object. Just one. Set your timer for 10 minutes. Paint your object in the first square. When the timer goes off – stop! I mean it. Repeat until you are done. You can rotate your object and/or change the light for each new square.
The objective: You want to get a feel for your object in terms of brush strokes. Make sure you SQUINT and SIMPLIFY! Whatever you do, DON’T get bogged down by the details or you’ll never finish. Try to think of it NOT as an apple (or whatever you’ve chosen) but rather just shapes and colors and values. Paint what you see – not what you THINK you see. If you find yourself doing the same thing every time – experiment! You won’t learn unless you try something different. Expect the first one to be bad – you are getting a feel for just how long 10 minutes is. They will only get better.
Carol Marine of Austin posted the above challenge on the Daily PaintWorks website.

Here are some of the entries for Carol's challenge:
Now YOU try it.

Here is an owl I chose to view, and then paint:


Looking for shapes?  I think not...still too focused on detail!

The fourth attempt was the better one.  But it still had too much detail.  However, it did look a bit less like a cat and a bit more like an owl.  Back to the drawing board.

The 10 Minute Challenge was a great exercise. IMHO.

Monday, November 15, 2010

Complementary Colors and Fibers

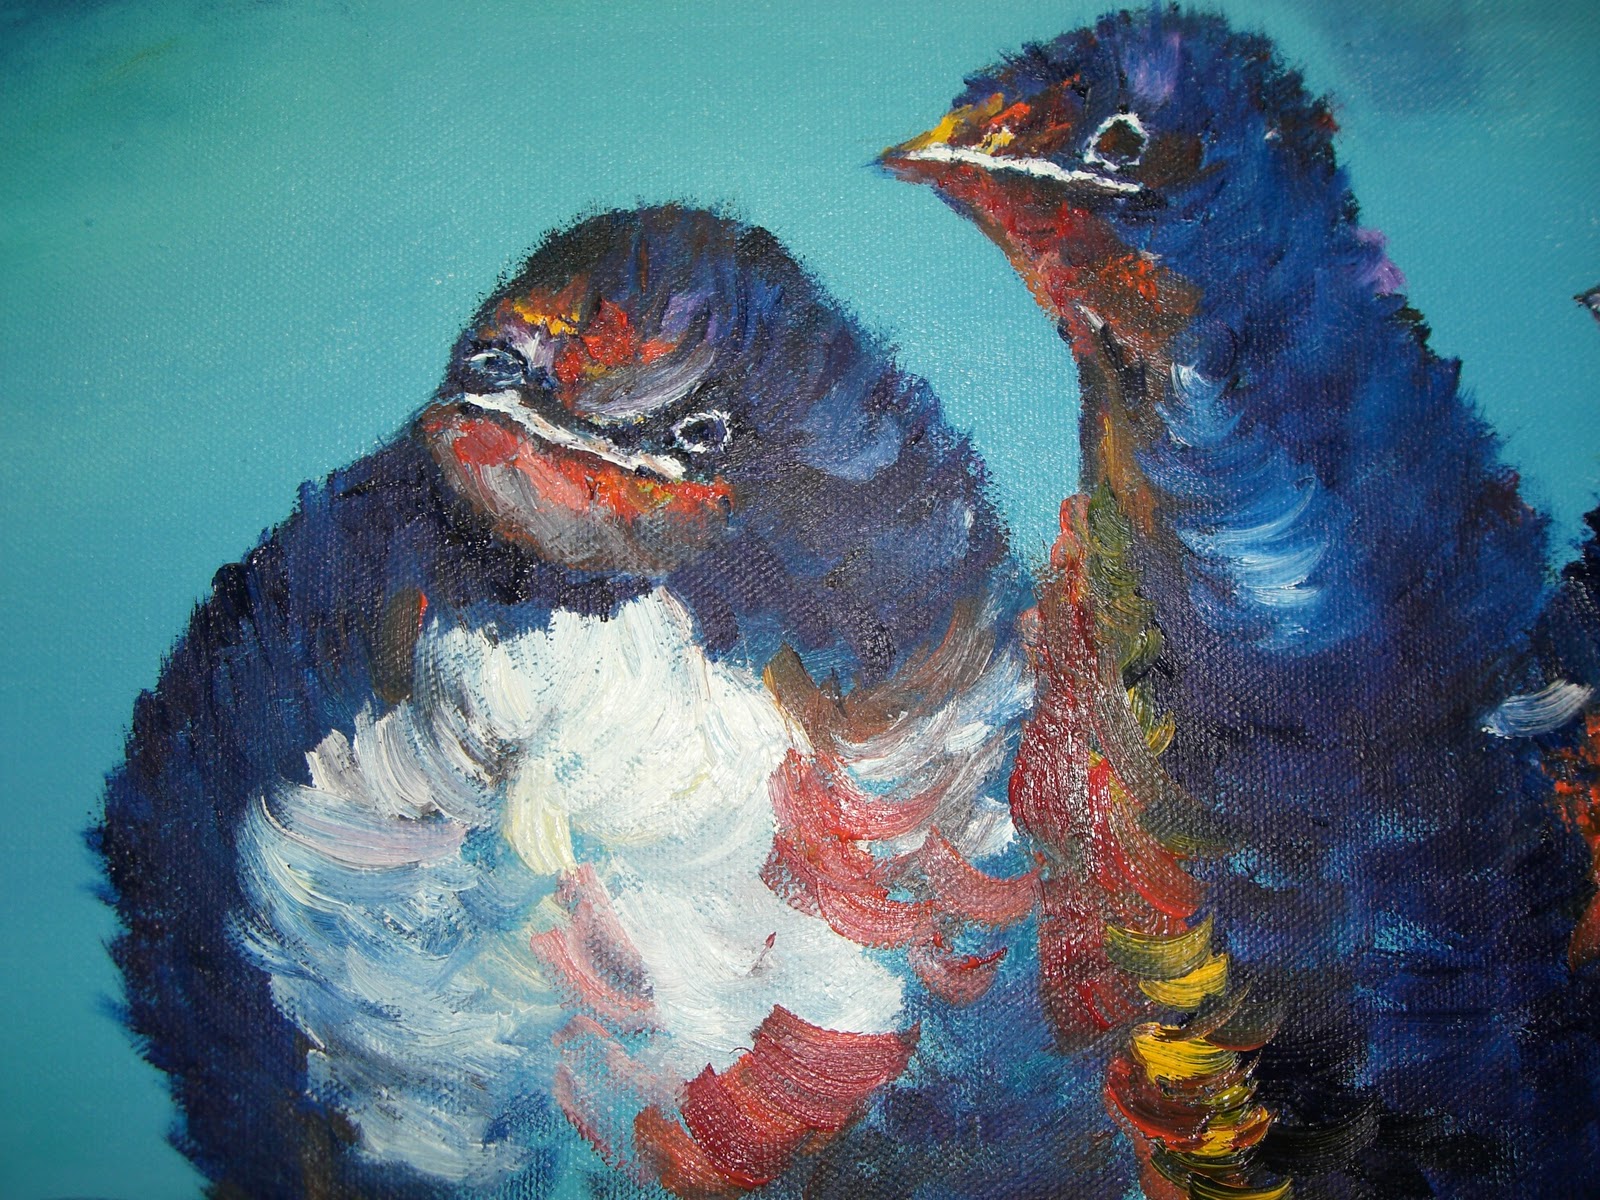
New color books on my bookshelf and a few older ones helped me prepare for a new fiber project.  Color books speak a different perspective on choosing a color palette, helping me define a new project in color choices I don't usually gravitate to.

Taking one of my oil paintings in purples, blues and greens and going to the color wheel for assistance, new yarn was purchased to make an afghan of granny squares.  This is ambitious as 18 skeins of yarn were purchased from Knit Picks.
Identifying the colors in the painting, I found these yarns at Knit Picks online.

On the color wheel, complementary colors are directly across from one another in the circle. Example: choosing the color red, its complementary color is green. Split Complementary Colors are "one off" from the opposite color. The split complements of red are the two colors on either side of the complementary color. Using this information, playing with the colors in making yarn selections opens up a whole new world from simply choosing one or two of your favorite colors for project work.

Here are the two books that I will be referencing to make the afghan from those 18 yarn skeins.  It will never be boring as there are 200 patterns, all the same size, that will keep this handwork ever changing.

The first book, 200 Crochet Blocks, is a gem.
First, the good: all of the blocks are designed to be the same size, so you can mix and match them as you please. This is a considerable help. I have a number of vintage crochet-block books from the 60s and 70s, and none of the blocks are the same size, so it takes a lot of tweaking for each block if you want to make an afghan.
Not so when starting from scratch, making each square the same dimensions and allowing for a uniform size.

The second book, Knitter's Yarn Palette, had a fun color wheel made of yarn to illustrate the use of the color wheel when choosing yarns:
Webs has this explanation of Knitter's Yarn Palette on its website:
This unique book explains everything there is to know about weight, gauge, texture, and the suitability of mixing yarns using a wide range of 30 projects that revolve around 10 themes including: Seashores, delicate shades of sky and sand, string, cotton, and linen yarns, ripple-effect techniques. Lazy Meadow, grassy green, poppy red, buttercup yellow, soft, silky, velvety yarns, ruffling and layering techniques. Tribal Adventure, earth tones, linen, wools, and felted yarns, felting techniques.
The washable and soft woolen yarns are a feast to the eyes and will definitely brighten up the coming dark winter days as I work with them.

handmade projects

Wednesday, November 3, 2010

Watercolor on Heavy Canvas Paper

Several weights of watercolor paper are in my stash, ready to be used for painting with tubed watercolors.

This newly finished "PANSY in BLUES" was painted onto 170 lb. canvas paper.


A thorough explanation of why various weights of paper are used for watercolors can be found here.

If anyone with camera expertise can tell me how to get that flash blur off the glass reflection, please let me know.  I did take the flash off, but then the colors did not show through the glass.

Framed and matted, 9" x 12":

Thursday, August 19, 2010

Two Paintings Finished 8/19/10

Bragging or complaining: after 13 months and still needs work:


30" x 40", Oils, Gallery Wrap


Two Poppies, 8" x 10" Oils, Framed

Saturday, July 3, 2010

Sunbeams through Clouds and Bob Ross Teaching


While on the morning walk, I caught a photo or two of sunbeams filtering though billowing cumulus clouds.

It did not seem like too difficult a task to try and capture a few beams in oils coming through clouds on a landscape.  (Wrong.) 

This, after many painting attempts, does not nearly capture that view:
It needs lots more contrast in the lights and darks and many more layers of paint.

The late Bob Ross shows how to make clouds on a YouTube video:


NOW, after reviewing the Ross video, let's take a snippet of the cloud from the lighthouse canvas:

And with a little fan brush work, here is a later rendition of clouds with a bit of tutalage from Bob Ross:

The pinks need to be worked in, along with more white. It is a work in progress!

Saturday, June 26, 2010

A Good Recipe for Oil Stains

Have you needed a certain color stain for wood and did not know how to come up with an oil and paint formula?  Stains (colored) will allow the grain of the wood to show through, and are an attractive alternative to opaque paints.

In staining wood chairs, picture frames and even wooden siding on a small outdoor utility house, I have mixed together turpentine, oil paints and linseed oil in various proportions. Now I find a real formula for creating a stain! Here is the formula given from the site Antiquerestorers ...


This is an unfinished wood frame purchased at a craft store for an 8" x 10" oil that I am working on.  I got the canvas first, then found the open backed wood frame with the same dimensions.  Now all I need to do is paint the picture, and stain the unfinished wooden frame.

Later:  below is a picture of poppies (oil medium) in progress, along with that same wooden open backed frame shown above, but now stained with red and yellow oil paints, turpentine and linseed oil.

The frame colors will exactly complement the colors in the poppies, and will alleviate the need for a costly framing job.

The reason that the colors are an exact match is because they came out of the same tubes as the paints used in creating the poppies.  Otherwise, you could never find a "finished" frame in the colors as the ones used in an original artwork.

This idea and stain formula works for wooden chairs, too!

Wooden Rocker painted, stained and donated (for Hospice   Chair-ity Fundraiser)