Saturday, May 21, 2011

Chemo Cap to Crochet

Ironically, sadly, three chemo hats are still in my cedar chest that my mother used during her cancer treatment in 1999, and that I saved because they reminded me of her.  She was not a complainer, and always grateful for whatever the day held.  I do try to emulate that quality, though sometimes it is a challenge.

This is my mom and me in 2000 just before she died, wearing one of her favorite hats covering her little bald head:

Then, lo and behold, wouldn't you know that I then had the "opportunity" to use those same hats, and especially the one shown above on Mom, when I went through chemo.  Yup, it is so.

And now my daughter will be the recipient of these useful little garments to keep her head warm after she loses her hair due to chemotherapy.  Three generations of women with cancer: bing, bing, bing.

Never fear, she won't have to just use those old hats (even thought they are quite attractive and still functional).  I am making her a couple more with crochet and knitting needles.

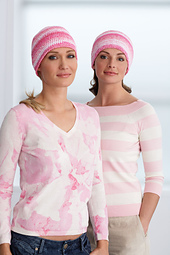
Here is a pattern I came across this morning: free, free, free and easy, Bernat offers this chemo hat as a download with a (also free) registration to their website:
As a quick update on Julie, she has been diagnosed with Stage III B breast cancer, and will have her chemo port placed on May 23.  They are trying to shrink her tumors prior to a mastectomy.

The chemo cotton hat will be started today as I listen to Frank Delaney's Ireland on audiobook.  If you are on Ravelry, there is an audiobook group and a podcast group that you might check out; this group has excellent suggestions on good listens.  I'm currently listening to several books on tape, depending on moods and inclinations.

Now I'm off to Michael's as soon as they open to buy three balls of cotton yarn so I can snuggle down for a good session with Ireland and my hooks and needles.

Friday, May 20, 2011

Crochet: Laptop Bag with Six Layer Padding

You know how Sandra Lee uses prepared foods and makes them look like a lot of prep time went into it, supposedly fooling her guests with a delicious end product?
This crochet project was done along the same lines, using a few things that were on hand in the craft closet and finishing it off with a handmade smaller project.  The end result looks like an expensive purchased laptop case,  IMHO.

Start with a $2 canvas tote from the craft store for the middle lining...sandwich that between the outer crocheted "public side" of the laptop bag and the fabric inner lining.  Then add in some pretty fabric for lining and attach a key ring for personalization.


The recylced canvas tote had sturdy handles, so they were disassembled and covered with matching fabric and zigzagged onto the bag (one is hidden and only attached to one side of the bag for ease ofloading the laptop into the jacket).
Directions for making this 9" x 12" cover:
  • chain 95 stitches of cotton yarn with Size E crochet hook
  • double crochet contrasting complemenery yarns in rows to your liking (I crocheted 4 rows, 3 rows, 4 rows, 3 rows to a length of about 23 inches, turning and changing colors at whim at the end of the rows).  Now you have a little piece of fabric that looks like a doll blanket.
  • fold over the finished crocheted piece of fabric to make a (roughly) 11.5"x 9" product; single crochet edges together
  • create lining using canvas and pretty fabric, right sides together, sewn together leaving the ends open, and pressed with a steam iron (only 1/3 yd. of fabric is required)
  • sandwich the canvas sturdy lining between with the pretty fabric lining cut to 23" x 9" to create a 6 layered, cushy pad for your laptop.   Add a finished fabric binding to the top of the tote to cover the raw edges.
  • create fabric covered straps from the canvas tote by sewing fabric atop the handles and turning the fabric over with 1/4 inch edges, tacking down with blind stitches
  • add a purchased key ring with charms to finish off the tote
Note: some assembly is required (grin)

Tuesday, May 17, 2011

Herbs of Provence

A friend sent my husband Herbs de Provence for Christmas.  It was a thoughtful gift that is a daily use as chicken dishes, eggs, and fish all benefit from a dash of this lovely mixture.  The crock contains finely ground thyme, rosemary, basil, savory and marjoram, and a small hit of lavender in the concoction. (Thank you, Dorothay!)
Coq au vin and this recipe with a whole chicken perched atop a beer can is one of the husband's specialties (he sometimes uses Herbs of Provence inside the chicken):

Currently in my little corner of the world we are growing:
  • mint (LOADS of it)
  • rosemary
  • chives
  • tarragon (the tag says "Texas Tarragon")
  • parsley
  • oregano
  • sage
  • cilantro
  • garlic
  • basil (hopefully the tiny seeds will provide the base for many containers of pesto)
Every time I try to grow thyme, it seems to fade in the heat.  Guess it needs a different spot.

Garden stakes with herb names imprinted on the front have faded over the years, so this is what I purchased from Amazon:
The ceramic labels have not yet arrived, so I went ahead over last weekend and planted some herbs with the old garden markers stuck in the soil.

Here are some recylcled window herb garden containers that perked up with Spray Paint refashioned by Centsational Girl:

Good idea, as I have several containers that could use a good slathering of paint to give them fresh faces.